
In this article, we will learn How to Configure DHCP Scope on Windows Server 2019 Step by Step. DHCP Scope is a package of information inside the DHCP server that holds IP addresses, subnet mask, default gateway, and DNS server addresses that are within your network. And when any DHCP client requests a dynamic IP address from DHCP Servers, the IP address and other information included in the package assign the computers who request it.
In our previous article, we have learned How to Install and Configure DHCP Server on Windows Server 2019.
Create IPv4 DHCP Scopes
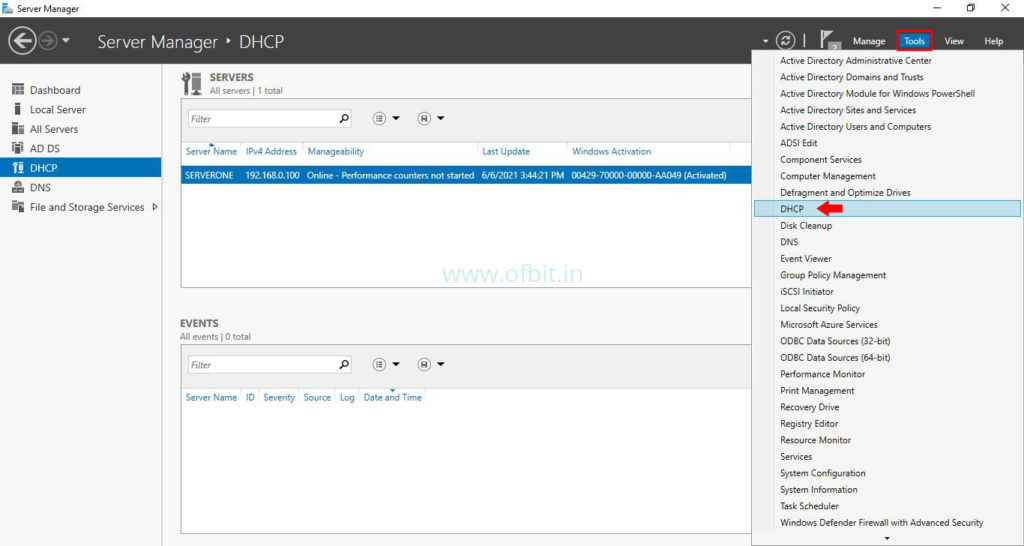
Step1: Open DHCP Console.
Click the Server Manager icon on the taskbar. Then click Tool from the top right corner and select DHCP for the drop-down menu.
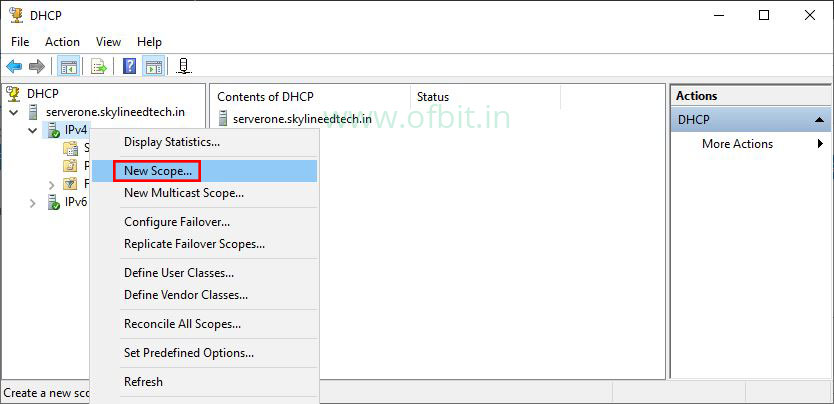
Step 2: Create IPv4 DHCP Scopes
First Expand the server, Verify that both IPv4 and IPv6 show a green checkmark indicating that the DHCP server is properly authorized in Active Directory. Now right click on the IPv4 and select New Scope…
Step 3: New Scope Wizard
Welcome to the New Scope Wizard, click Next to Continue.
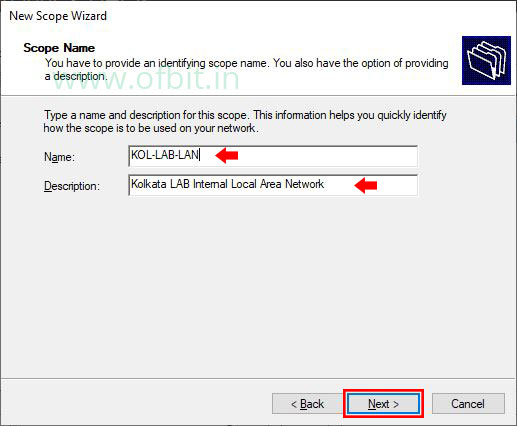
Step 4: Scope Name and Description.
Type the Name and Description for this scope. Try to choose sensible names for your scopes so that other administrators will be able to figure out the purpose of the scope and how the scope is to be used on your network.
Click Next to continue.
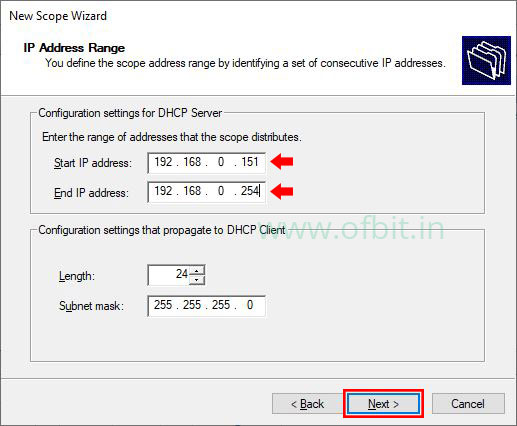
Step 5: Defining the IPv4 Address Range in DHCP Scope.
On the IP Address Range screen, type the Start and End IP Address of the range that the scope distributes. The Wizard will automatically calculate the appropriate subnet mask for the range. Although you can manually define the same.
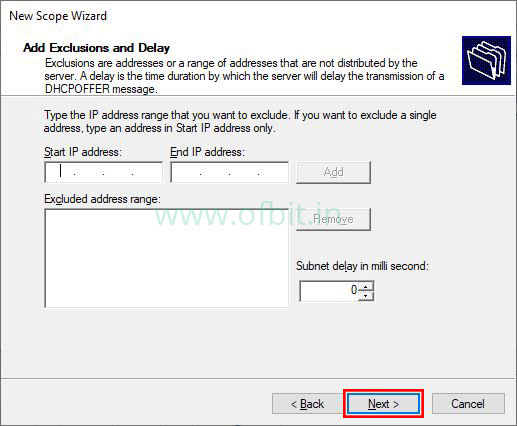
Step 6: Add Exclusions and Delay
Exclusions are IP addresses that are in the pool, but they do not get issued to any clients. And the delay setting is a time duration by which the server will delay the transmission of a DHCPOFFER message.
For this tutorial, we leave this option default and Click Next to Continue.
Step 7: Configure a Lease Duration
This lease duration allows you to set how long a client gets to use an assigned IP address from this scope before it has to renew its lease. If your network is highly dynamic set the lease duration shorter. If less dynamic, set a longer lease duration. The default is 8 days and we will go with this setting.
Click Next to Continue.

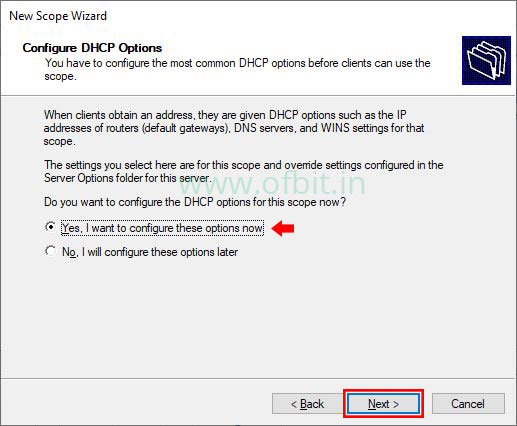
Step 8: Configuring DHCP Options.
This screen allows you to choose whether you want to set up basic DHCP options such as default gateway, domain name, DNS settings, and WINS settings for this scope.
Select Yes, I want to configure these options now and click Next to continue.
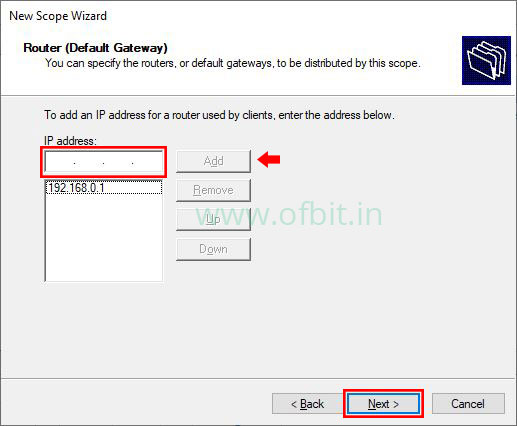
Step 9: Configure Default Gateway details.
On this screen put the IP Address of your Router or Default Gateway and Click Add button. Once added Click Next to Continue.
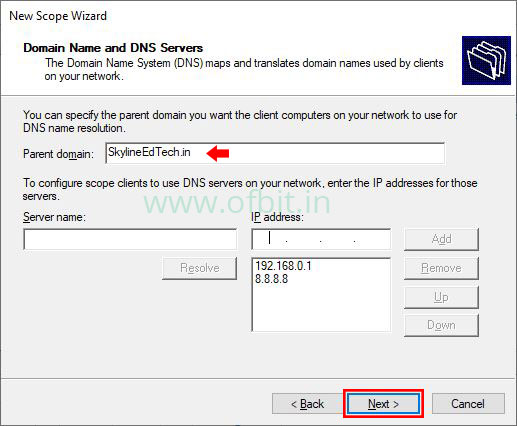
Step 10: Configure Domain Name and DNS Server details.
On this screen, specify the Parent Domain, which you want the client computers on your network to use for DNS name resolution.
Put the IP address of your DNS server and click Add button. Click Next to Continue.
Recommended Article: Install and Configure DNS Server on Windows Server 2019.
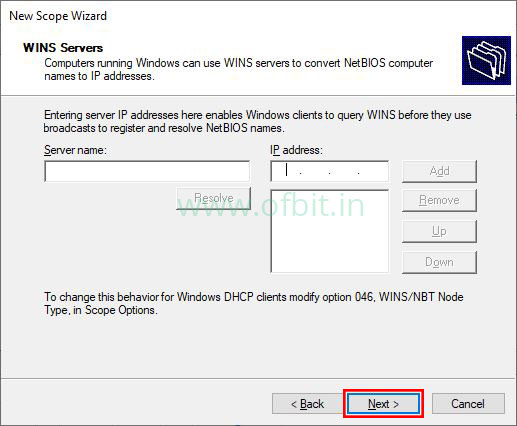
Step 11: Configure WINS details.
If you still having WINS on your network you can configure DHCP so that it passes WINS server addresses to your Windows clients.
Step 12: Active DHCP Scope.
Select Yes, I want to activate this scope now and click Next to continue.
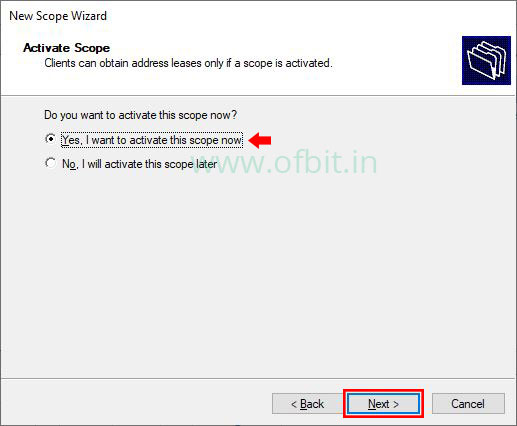
If you want to activate the scope later, choose No, I Will Activate This Scope Later. In this case, the scope will remain dormant until you activate it manually.
Step 13: Completing the New Scope Wizard.
You have done with the Configuration, click Finish to close this Wizard.
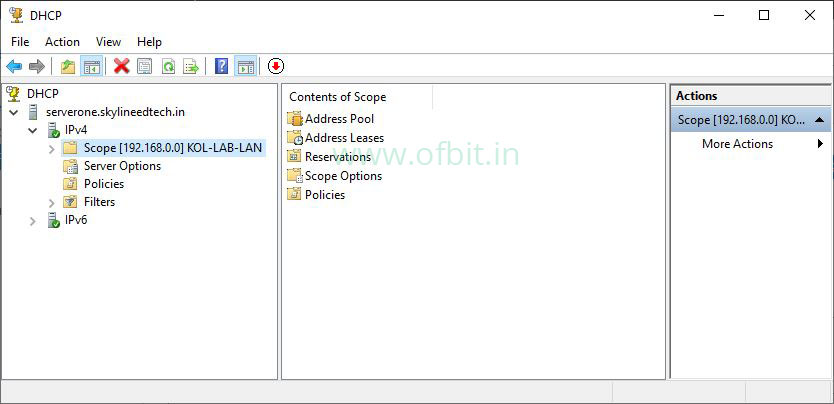
Step 14: Confirm the Configuration.
The below screen will show you the newly created DHCP scope. Expand the Address pool to confirm the IP address range you configured.
Follow us:
If you like our articles and tutorials, you can follow us on Facebook. Also, join our Official Facebook Group for QnA sessions and Discussions with the worldwide technical community.


[…] we have to Configure DHCP Scope to complete the DHCP […]