In this article, we will learn How to Install IIS Web Server on Windows Server 2019. IIS stands for Internet Information Services, is a flexible, general-purpose Windows Server-based web application to deliver Website (HTLM) Content, pages, or files to an end-user over the Internet.
IIS WebServer uses communication protocols like HTTP, HTTPS, FTP, FTPS, SMTP, etc. to deliver requested static webpages, downloads and uploads, image files, and more.
How to Install IIS Web Server on Windows Server 2019
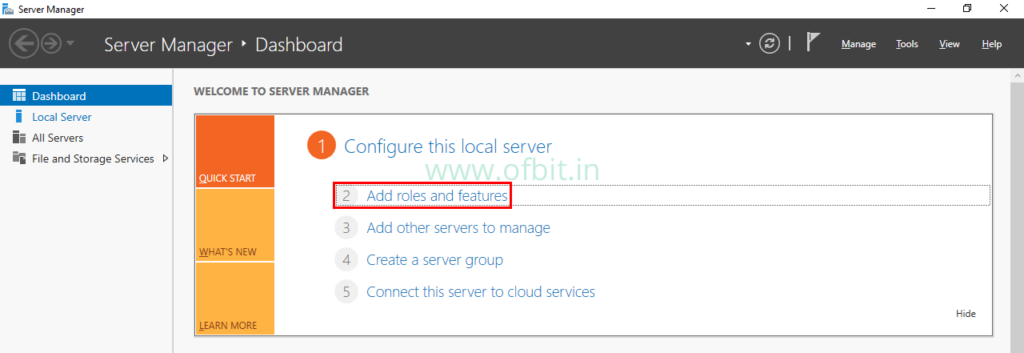
Step 1: Click on Add Roles and Features from the Server Manager.
Once you logged in to your Windows Server 2019, the Server Manager will pop up by default. Optionally you can click the Start button and search for Server Manager. Once open, click on Add Roles and Features.
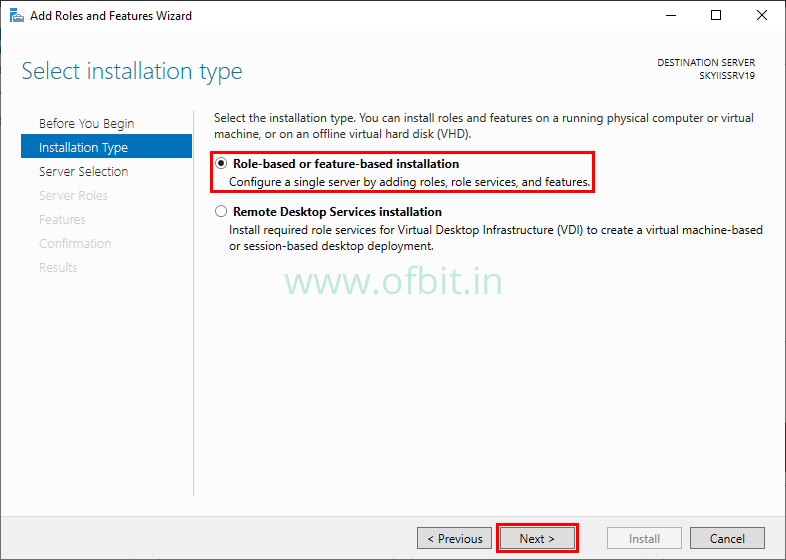
Step 2: Select the Installation Type.
On the first screen ‘Before you begin‘ click Next to move on to the next screen. Once you are in a ‘Select Installation type‘ screen, select Role-based or feature-based installation and click Next.
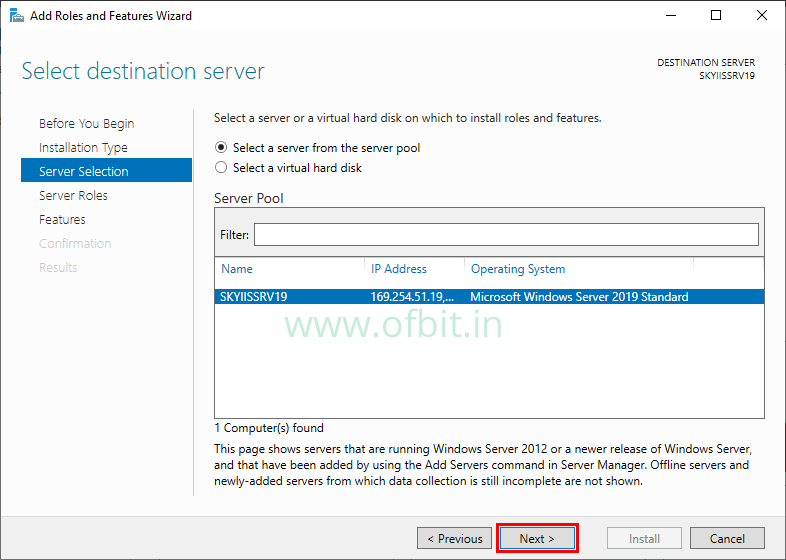
Step 3: Select the destination server.
On this screen select the server on where you want to install the IIS Server role and features. And then click Next.
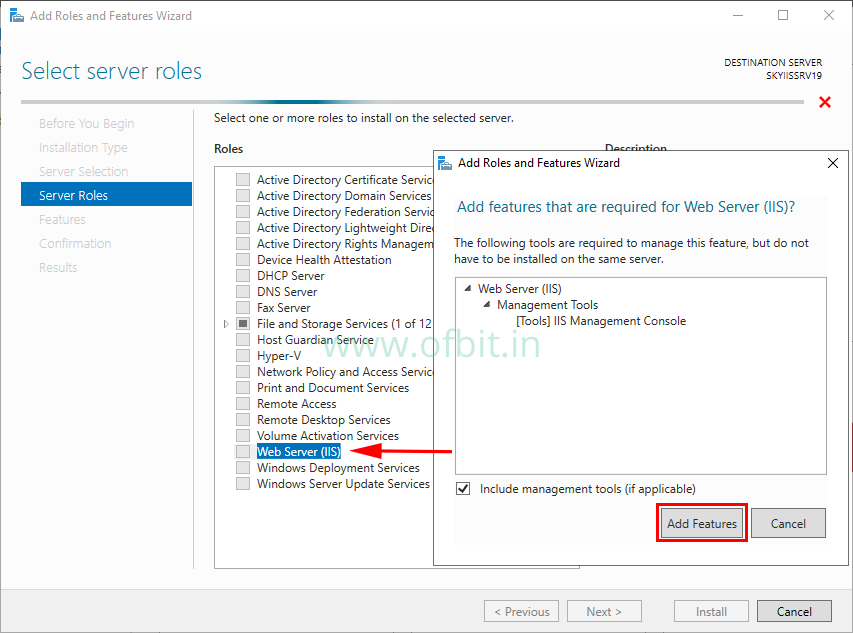
Step 4: Select the Web Server (IIS) Server role and add features.
On this Server Role screen, select the Web Server (IIS) check box, once you select another screen will pop up which ask you to Add features that are required for Web Server (IIS). Click Add Features and then click Next.
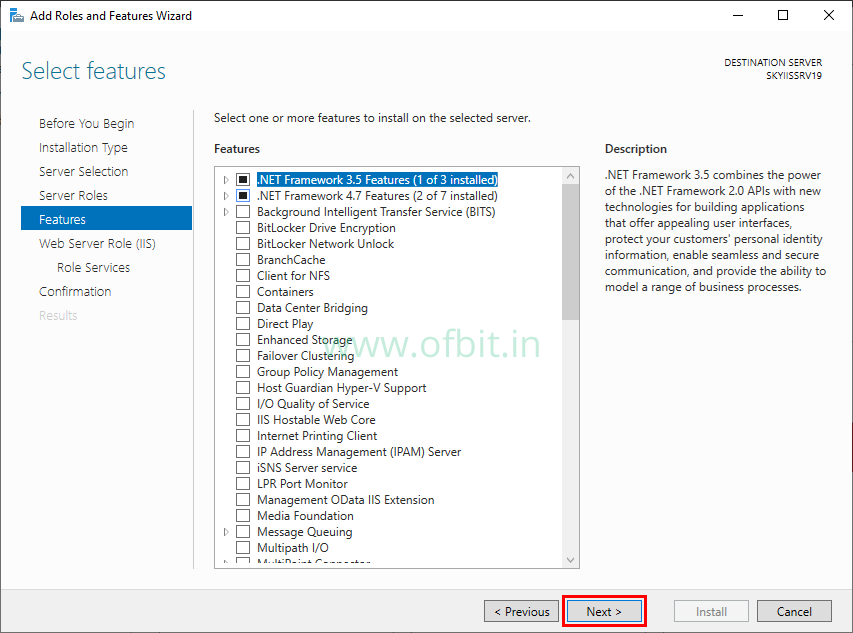
Step 5: Select one or more Features.
On this screen required features are by default selected, also you can select one or more features as per your requirements. Click Next to continue.
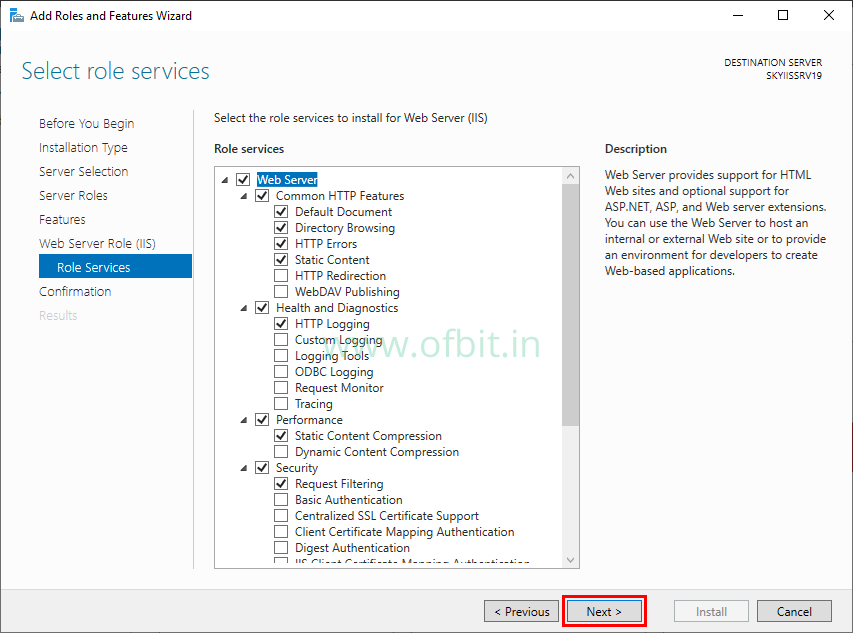
Step 6: Select Web Server (IIS) Role Services.
On the Web Server Role (IIS) screen, read the information and click Next. Now on the Select role services screen as per your requirement, you can install an additional role for your IIS server by check the boxes. Click Next to continue.
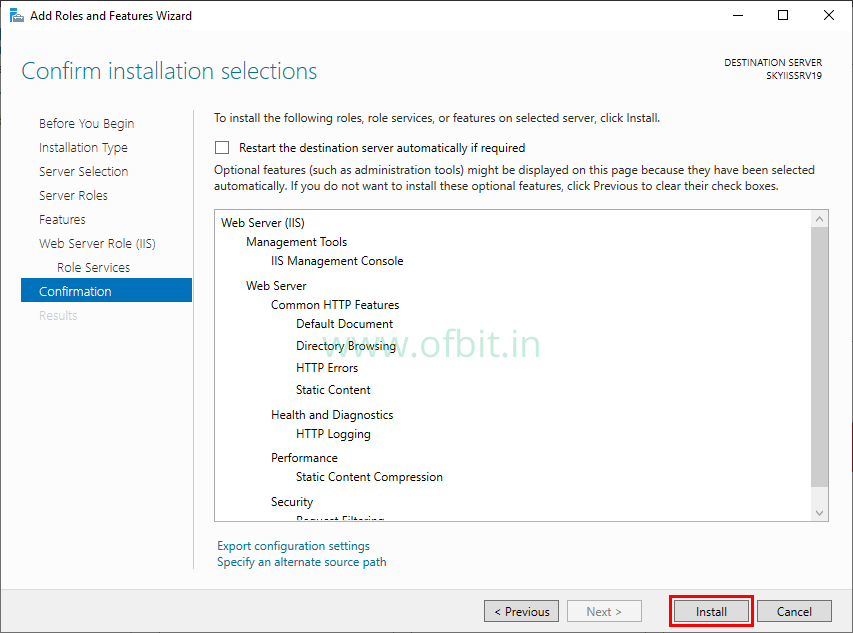
Step 7: Confirm installation selections.
On this final screen, review the listed roles, role services, or features and click Install.
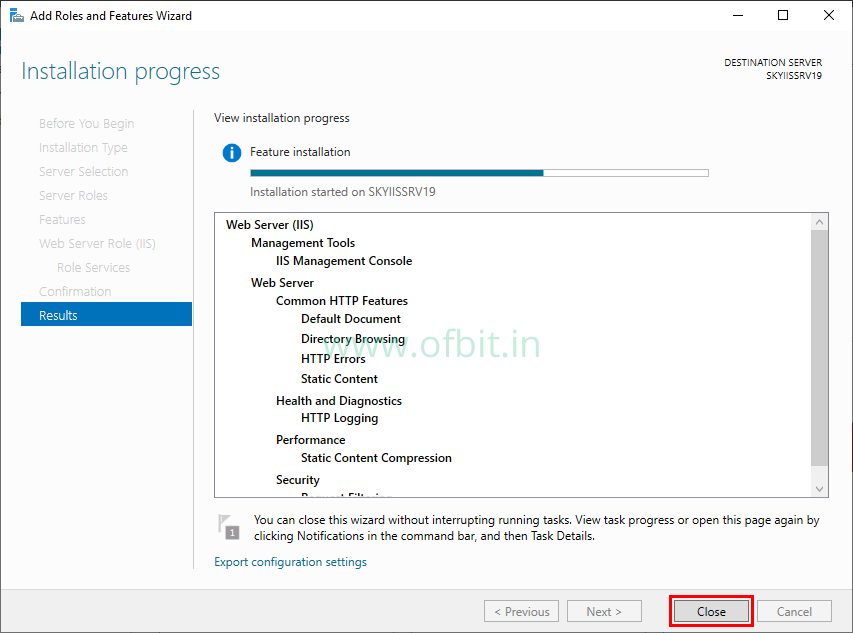
Step 8: Complete the installation.
Once the installation successfully completed. Click Close button.
Test the IIS Server
Once installation completed, we can check if the Web Server is up and running by performing a simple test.
Open your web browser, and type localhost in the address bar, and hit Enter. This will open a default Internet Information Services (IIS) WebServer page.
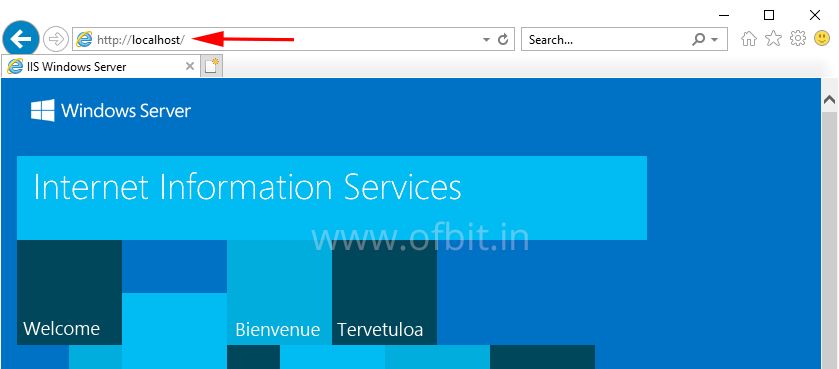
Well, We have successfully installed the IIS Server on Windows Server 2019 and tested also that the IIS Server is Up and running. In our upcoming tutorial, we will learn how to configure it.
You might also be interested in:
How to Install Windows Server 2019 [Step by Step]
Follow us:
If you like our articles and tutorials, you can follow us on Facebook. Also, join our Official Facebook Group for QnA sessions and Discussions with the worldwide technical community.


