
In this article, I will show you how to permanently disable Windows Defender. Well, Windows Defender is Microsoft’s own security suite that comes with Windows 10 to protect your system from viruses, malware, ransomware, spyware, etc.
Windows Defender disables itself if it detects any other third-party Security solution in the system, but it is not possible to disable it permanently or uninstall it.
Where else in some situations you may need to Uninstall it as it can be done in the previous versions.
Well, by changing a few settings in group policy and Registry, you can permanently disable Windows Defender in Windows 10.
How to Permanently Disable Windows Defender from the registry?
Step 1: Open the Registry Editor.
Press Windows+R to open Run and type regedit and Enter.

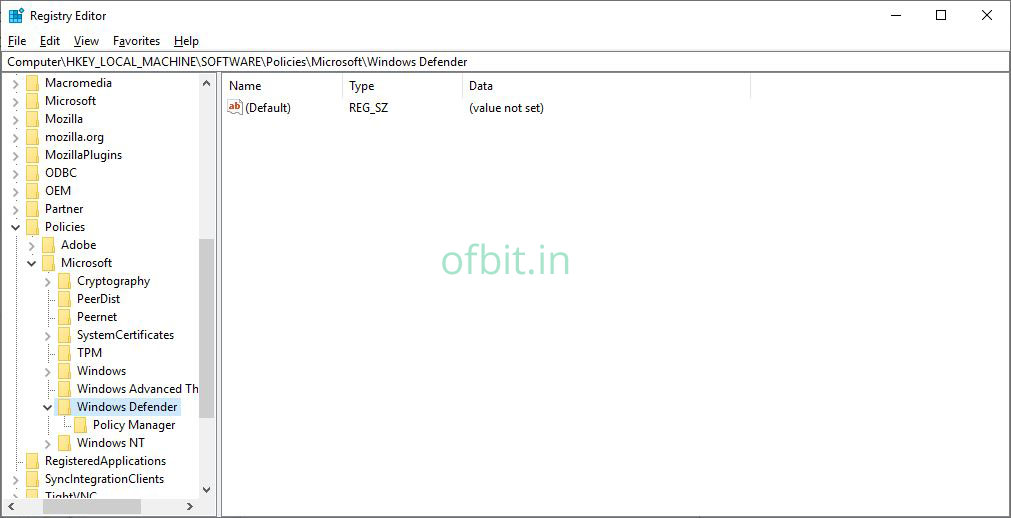
Step 2: Go to the below path or simply Copy the below path to address bar and press Enter.
HKEY_LOCAL_MACHINE\SOFTWARE\Policies\Microsoft\Windows Defender
Step 3: Make sure the Windows Defender folder is selected, now Right Click > New > DWARD (32-bit) Value.
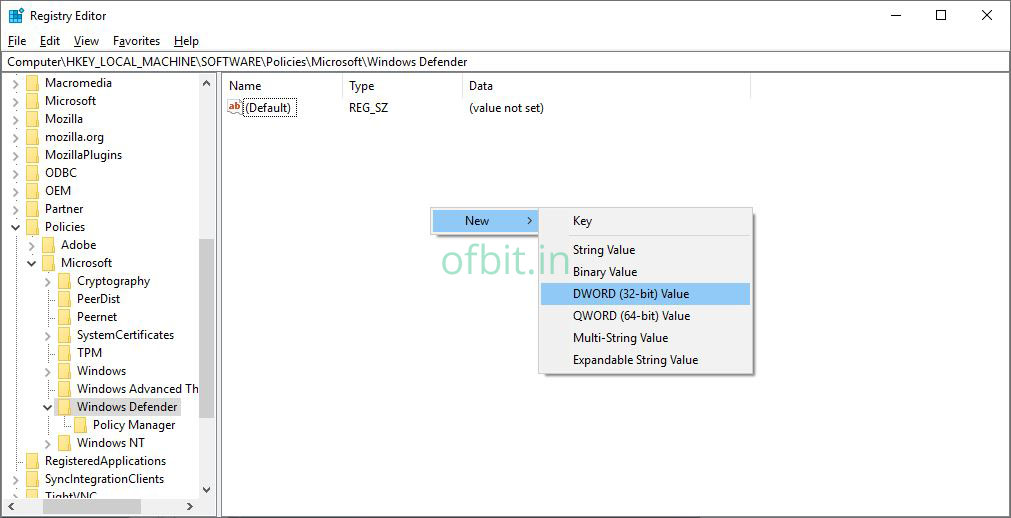
Name it “DisableAntiSpyware”.

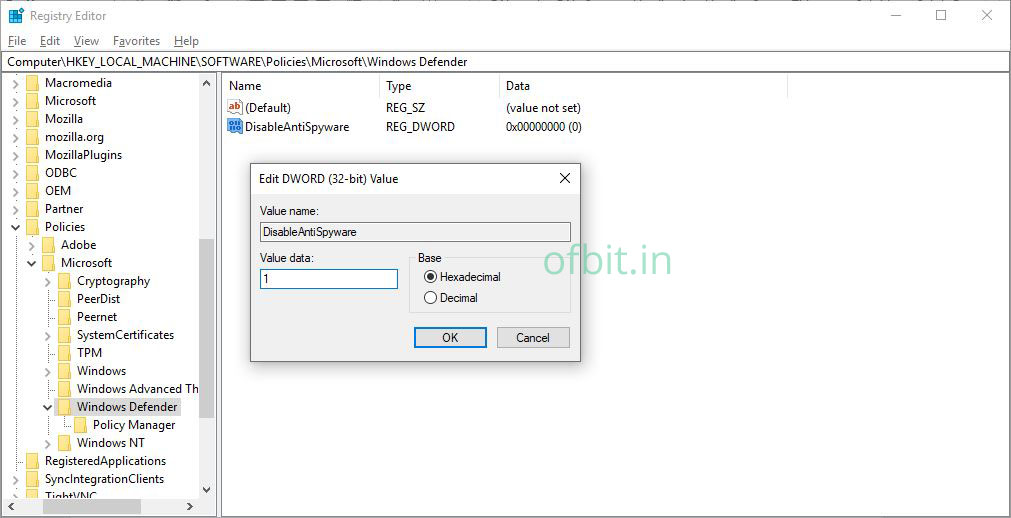
Step 4: Now double click on “DisableAntiSpyware” and change the value from 0 to 1.
Step 5: Reboot your system to apply the changes.
How to Disable Windows Defender from Local Group policy?
Step 1: Open the Local Group Policy Editor.
Press Windows+R to open Run and type gpedit.msc and Enter.

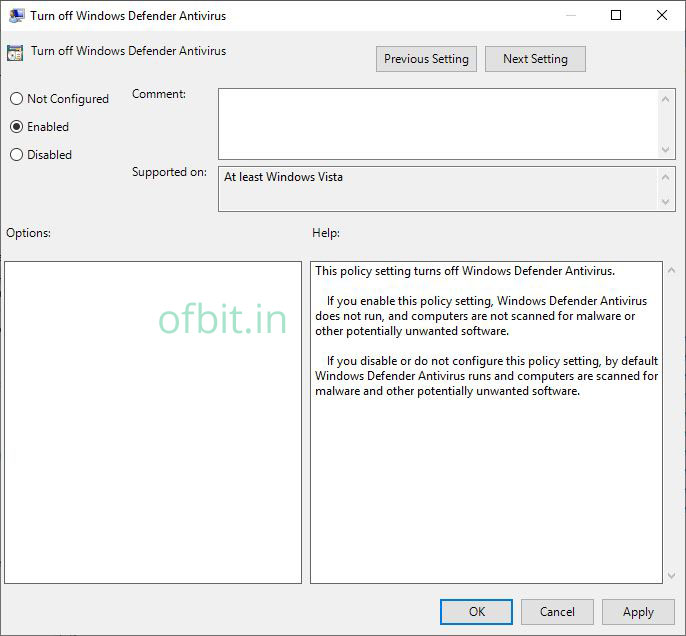
Step 2: Go to the below path and double click on Turn off Windows Defender Antivirus policy.
Path: Computer Configuration > Administrative Templates > Windows Components > Windows Defender Antivirus

Step 3: Select the Enable option and click the Apply button.
Step 4: Reboot your system to apply the changes.
Well, here we have successfully disabled the Windows Defender Permanently. But it is always recommended to use antivirus / antimalware for your real-time protection.

[…] How to Permanently Disable Windows Defender in Windows 10 […]