In this article, we will learn multiple Windows 10 Screenshot keyboard shortcuts. A screenshot, also known as screen capture, is used to take an image of whatever is on your current screen.
The default option to take a screenshot on Windows is Print Screen. On a keyboard, it labeled as PrtScn or PrtSc, etc. But here Microsoft introduced new ways to take screenshots on Windows 10 latest build.
Print Screen on Windows 10
Step 1: Press the PrtScn button to copy the Screen Capture to the Clipboard.
To capture the complete screen on Windows 10 or any older version of Windows Just press the Print Screen button. You will find it somewhere in the top row of the keyboard.
Step 2: Now Save the Screen Capture as an Image.
Open MS Paint, paste the screen capture then save it as a PNG or JPEG format. Or you can directly paste it on any Image Editor, Word processor, or other applications.
Windows 10 Print Screen Tricks
Trick 1: Save your Screenshot as a File.
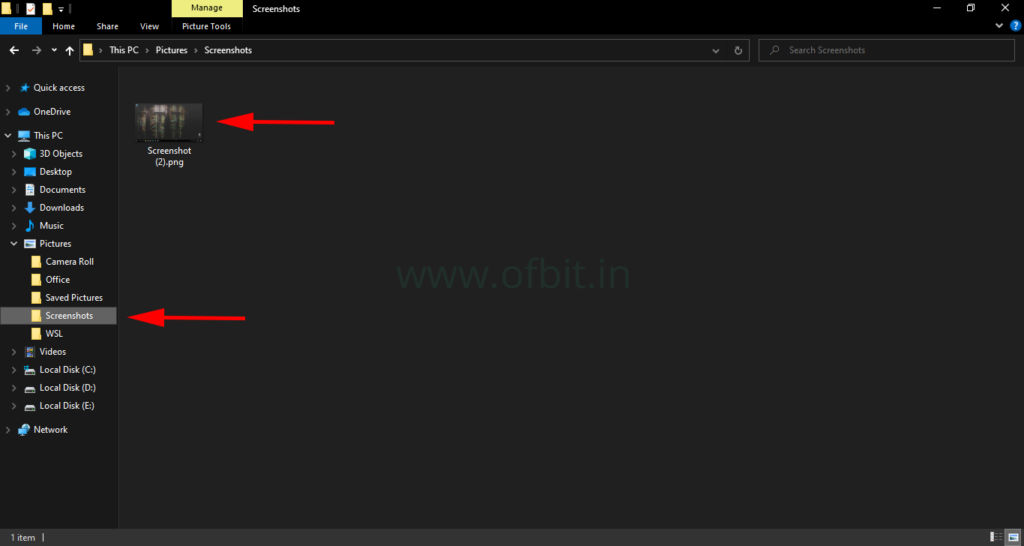
Press Windows Key+PrtScn or on some laptop you may need to press Windows Key+Fn+PrtScn together. Once you press the keyboard combination, the screen will dim for a second and the Screen capture will directly save in the Folder named Screenshot under Picture folder.
Trick 2: Take a Screenshot of Only One Window.
Click on the Title bar to active the Window that you want to capture. Now Press Alt+PrtSc, and the screen capture will be copied to the Windows clipboard. Now to save it, use MS Paint, Image Editor, Word Process, or any other application.
Trick 3: Take a Screenshot of Part of Your Screen.
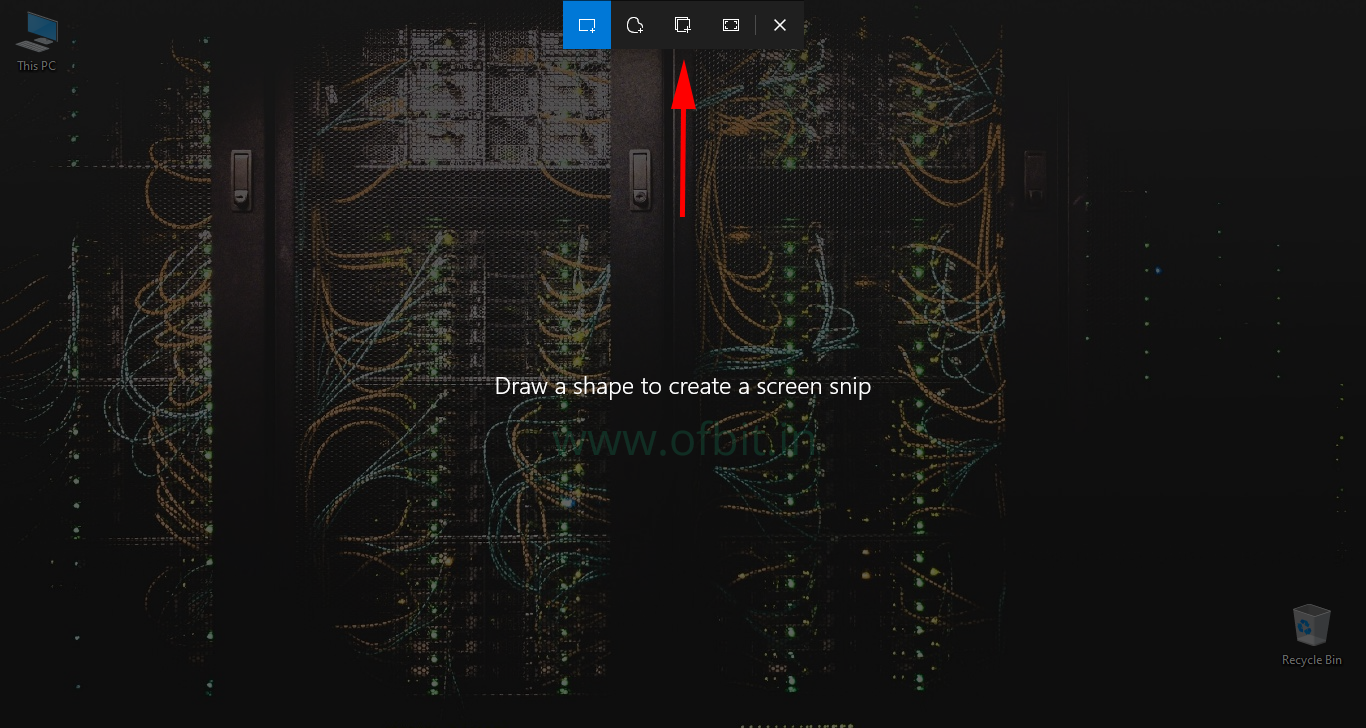
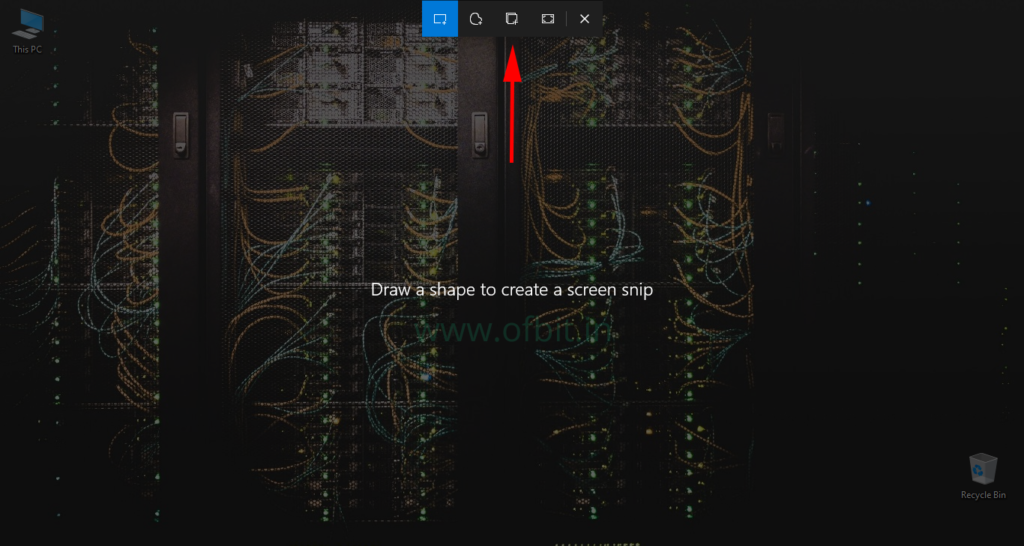
If you want to take a screenshot of some part of your Windows Screen, press Windows Key+Shift+S. Once you press the keyboard combination, the screen will be grayed out. Click and Drag your mouse pointer to select the part of the Windows Screen which you want to snip. Now, save it using MS Paint or any other application.
Windows 10 Screenshot using Snipping Tool
The Snipping Tool, another great tool to take a screenshot on Windows. This tool is first introduced in Windows Vista. This tool will give you multiple snip options. You can choose between Rectangular Snip, Windows Snip, Full-Screen Snip, and Free-form Snip. In Windows 10 a new option introduced in the Snipping Tool, “Delay”. You can delay the snip creation up to 5 Seconds to take tooltips, pop up menu, etc.
- Click on Start menu and type the Snipping tool and Open it.
- If you want to take any drop-down menu, tool-tips, or pop up menu click the arrow next to Delay and choose between 1 to 5 Second. Otherwise, follow the next step.
- Click on down arrow next to Mode to select Snip type or simply click New.
- Now Click on the Window or Select the area as per the Mode you choose.
- Once Screen Captured, you can use Pen, Highlighter to annotate the screenshot. (if required)
- To save the Snip, go to File and click on Save As… or the Floppy icon next to Delay.
Well, This is how you can take Screenshot in Windows 10. We have learned multiple ways of Screen Capture in Windows 10. Although there is another method to take a screenshot in Windows 10 via the Game Bar. We will discuss this method in another article in detail.
You might also be interested in:
For the latest article, follow Ofbit on Facebook, Twitter, Instagram.
This is the right blog for anyone who wants to find out about this topic. You realize so much its almost hard to argue with you (not that I actually would want…HaHa). You definitely put a new spin on a topic thats been written about for years. Great stuff, just great!
Great post
Thanks so much
Thanks for such an interesting and knowlegable stuff. I simply love to follow you and every writing here.