
In this article, we will learn How to Install and Configure DNS Server on Windows Server 2019. DNS is a vital component of any Active Directory implementation. Domain Name System (DNS) is a structured database similar to Active Directory that is often stored on Domain Controller servers. An Active Directory database contains information about the domain objects themselves, where DNS is responsible for storing and resolving all the names on your network. Windows Server 2019 utilizes the domain name system (DNS) as its primary method of name resolution.
Before we start Installing DNS Server, it is recommended that the Local Server should be configured with static IPv4. In case of IP address changes, clients might not be able to contact the DNS server.
Install DNS Server on Windows Server 2019
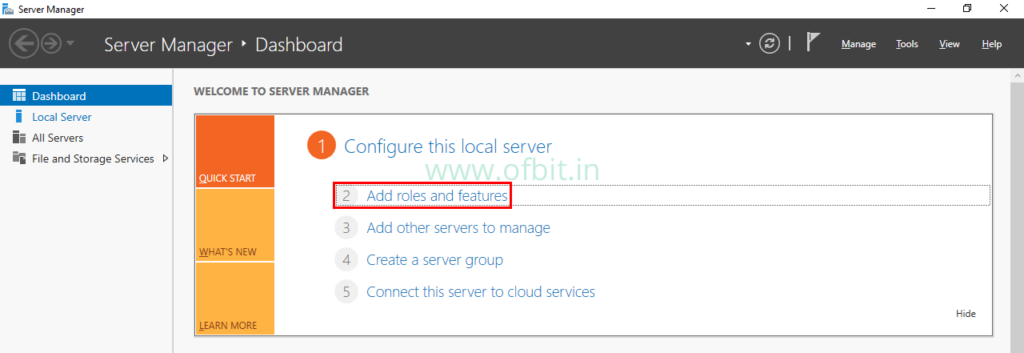
Step 1: Launch Server Manager and Click Add roles and features.
Alternatively, you can press the Windows+ R to open the Run, or open the Command Prompt. Then type ServerManager and press Enter.
Step 2: Click Next on the ‘Before You Begin’ page.
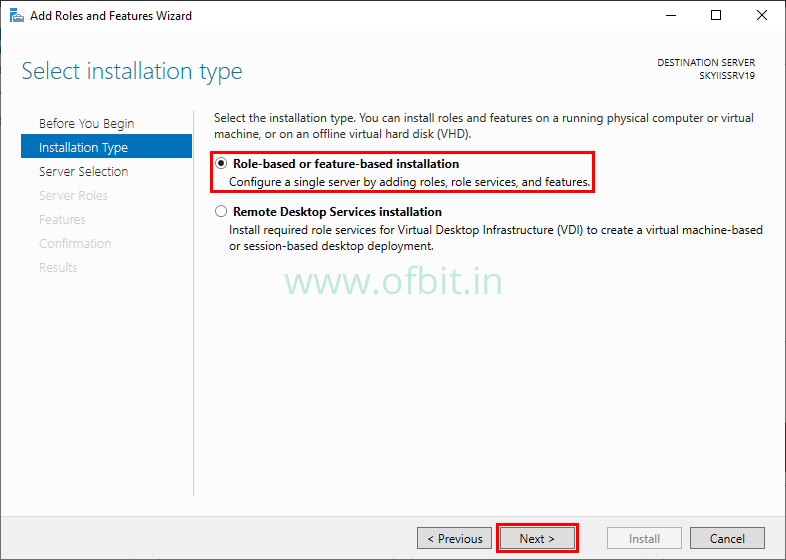
Step 3: Select Role-Based or Feature-Based installation.
On installation type page leave the default selection and click Next.
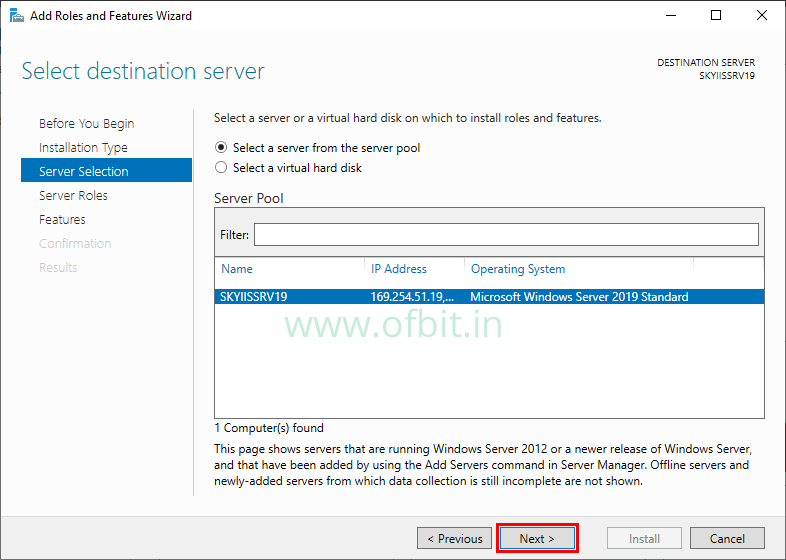
Step 4: Select Destination Server.
Select the server from the server pool to add the DNS role to and click Next.
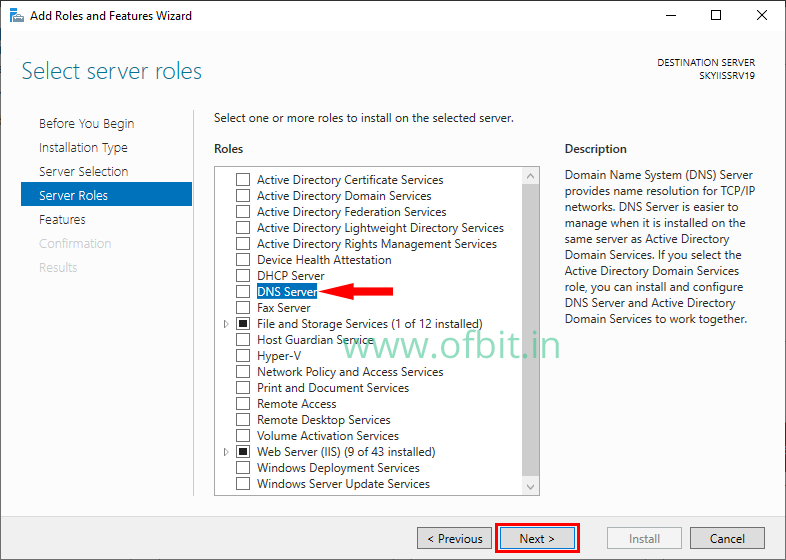
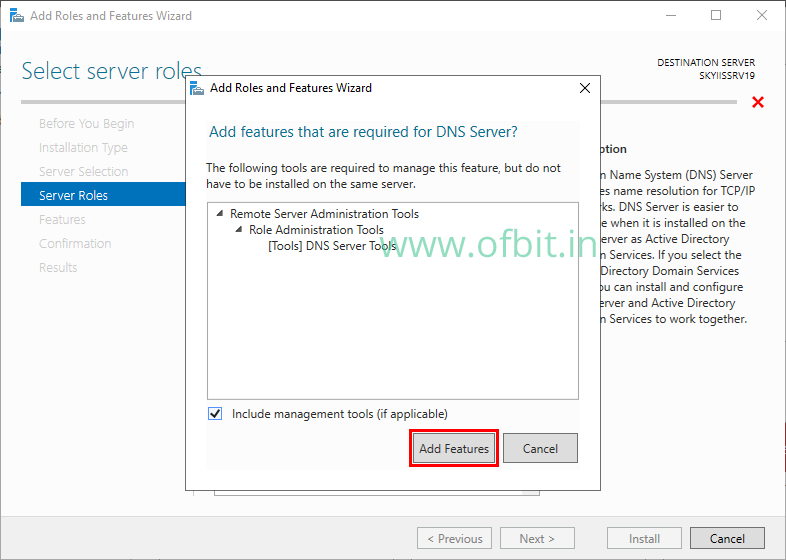
Step 5: Select DNS Server Role and Features that are required for DNS Server.
Select the DNS Server check box from the Roles.
On this pop up page, click Add features. And then Click Next to continue.
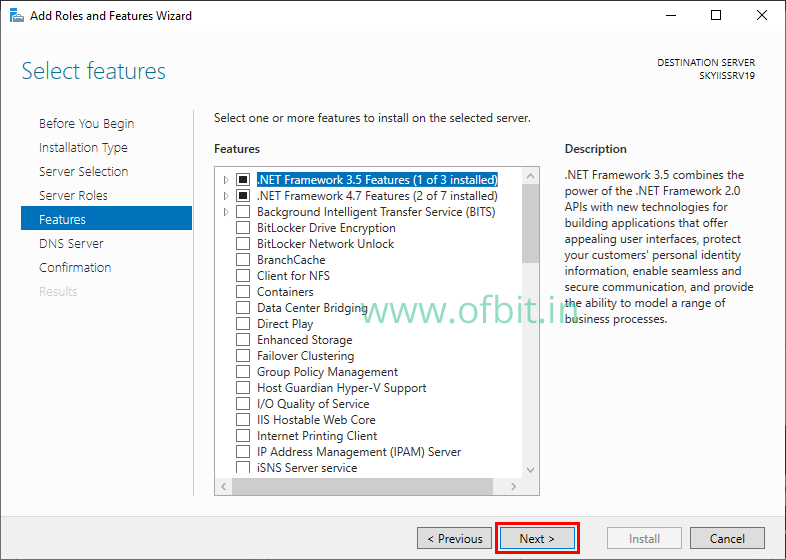
Step 6: Click Next to skip the Features selection.
Step 7: Click Next on the Introduction to DNS Server page.
This page will give you an introduction and things to notes for DNS Server. Click Next to continue.
Step 8: Confirm Installation Selection.
Click Install on the Confirmation page to install the DNS role.

Step 9: Once DNS Installation succeeded Click Close.
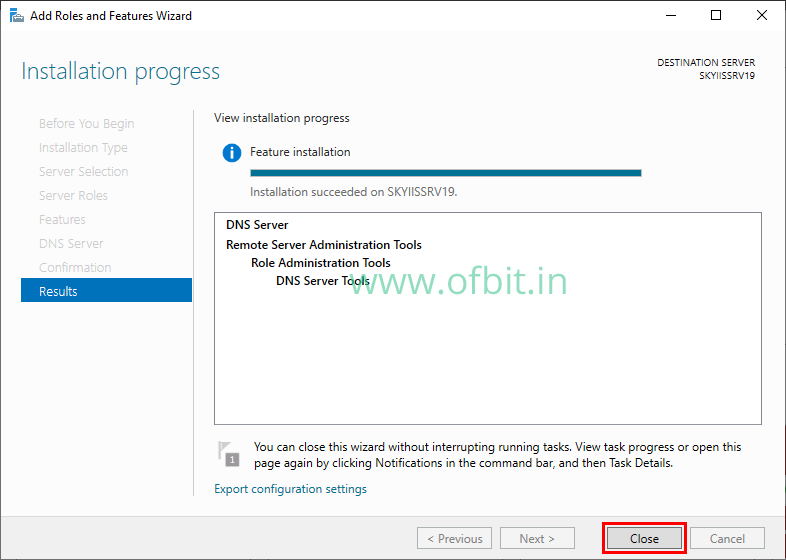
So we have successfully installed the DNS Server on Windows Server 2019. The installation process is very straightforward, and no reboot is necessary.
The DNS role has been installed on the Windows Server 2019 server but has not been configured yet. Now let’s move to the next section to learn how to configure DNS server.
Configure DNS Server on Windows Server 2019
In this section, we will learn How to Configure DNS Server on Windows Server 2019. Here we create a DNS Forward Lookup and Reverse Lookup Zones, which is recommended for a large network. After that, we will learn to create A and PTR records and confirm if the DNS server is configured and working.
First, let’s start with How to Configure DNS Forward Lookup Zone in Windows Server 2019.
Second, we will learn How to Configure DNS Reverse Lookup Zone in Windows Server 2019.
Follow us:
If you like our articles and tutorials, you can follow us on Facebook. Also, join our Official Facebook Group for QnA sessions and Discussions with the worldwide technical community.