
Remote Desktop is a feature by Microsoft, which allows to connect to and control your PC from another PC or you can take any Remote PC over a Local Network or Internet. Here in this article, we will learn How to Enable Remote Desktop in Windows 10. By Enabling Remote Desktop (RDP), you are allowing remote connections to your PC and access to all your files, applications, etc.
From Windows 10 Fall Creators update (1709), you can enable Remote desktop options from Settings. Although there are multiple ways to enable Remote Desktop, you can also download the app from Microsoft Store. First, we will learn Enabling Remote desktop in 2 steps like Expert.
Enabling Remote Desktop in Windows 10 in 2 steps like Expert
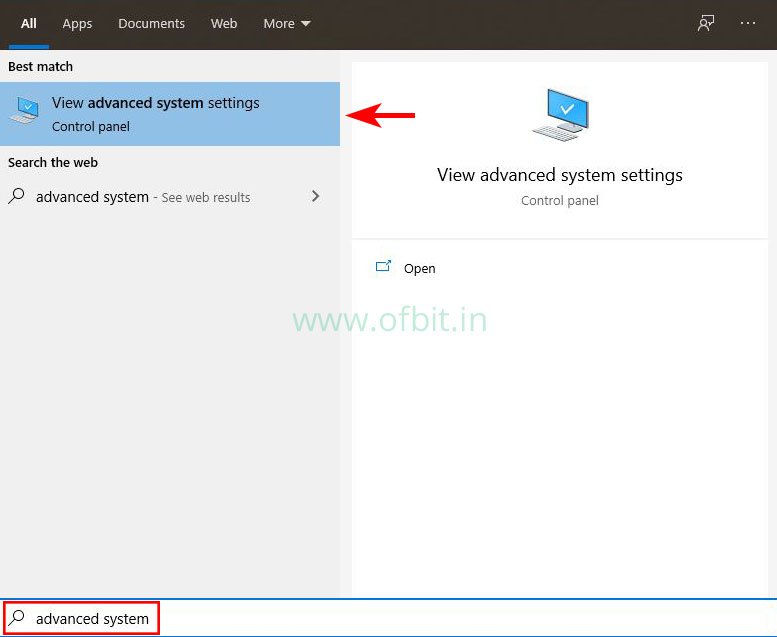
Step 1: Type ‘Advanced System‘ in Windows Search.
Press the Windows Key from keyboard and Type Advanced System. Click the first option View advanced system settings.
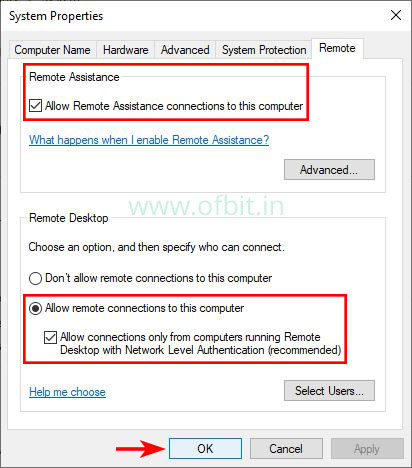
Step 2: Allow Remote Connections with Network Level Authentication
Go to the Remote tab, under the Remote Desktop section, select Allow remote connections to this computer. And click OK.
Enabling remote desktop in Windows 10 from System Properties
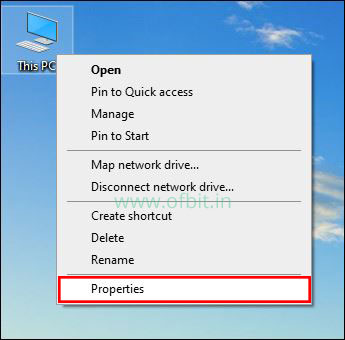
Step 1: Open System Properties.
Right click on the This PC and select Properties.
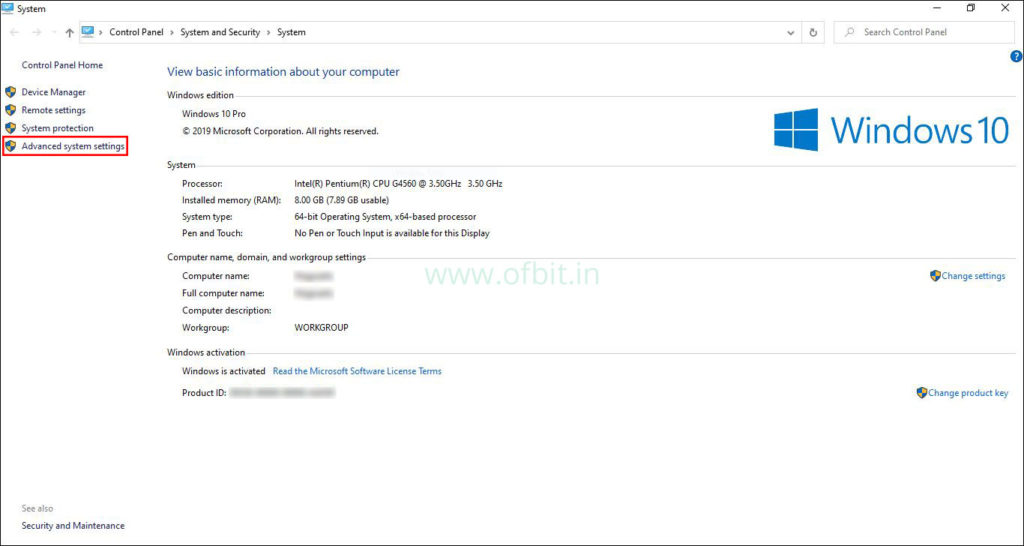
Step 2: Go to Advanced System Settings
From the Left section, click on Advanced System Settings
Step 3: Go to Remote Tab
Step 4: Allow Remote Connections with Network Level Authentication
Under the Remote Desktop section, select Allow remote connections to this computer. Also, check the Allow connections only from computers running Remote Desktop with Network Level Authentication option.
Click Ok.
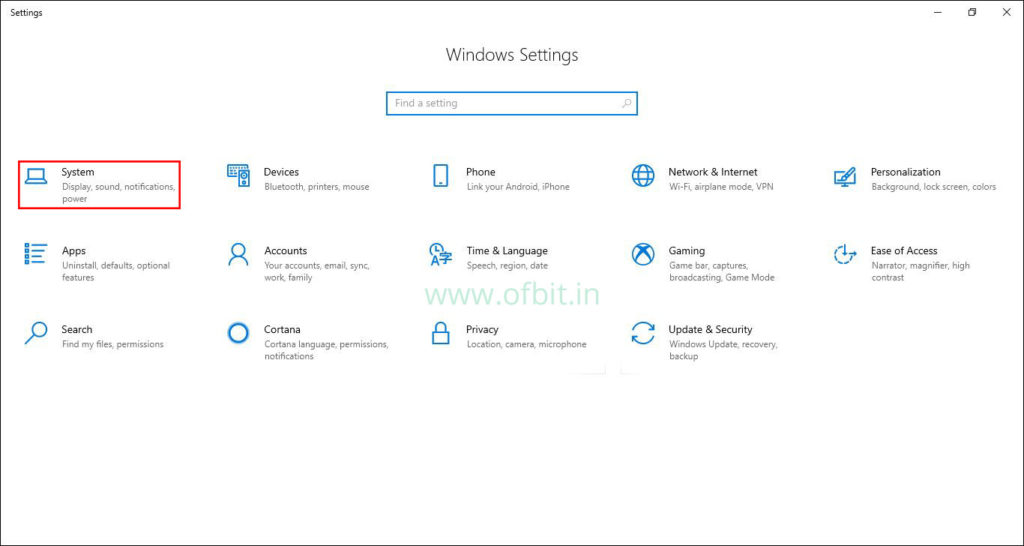
Enabling remote desktop in Windows 10 from Setting
Step 1: Open Settings
Step 2: Click on System
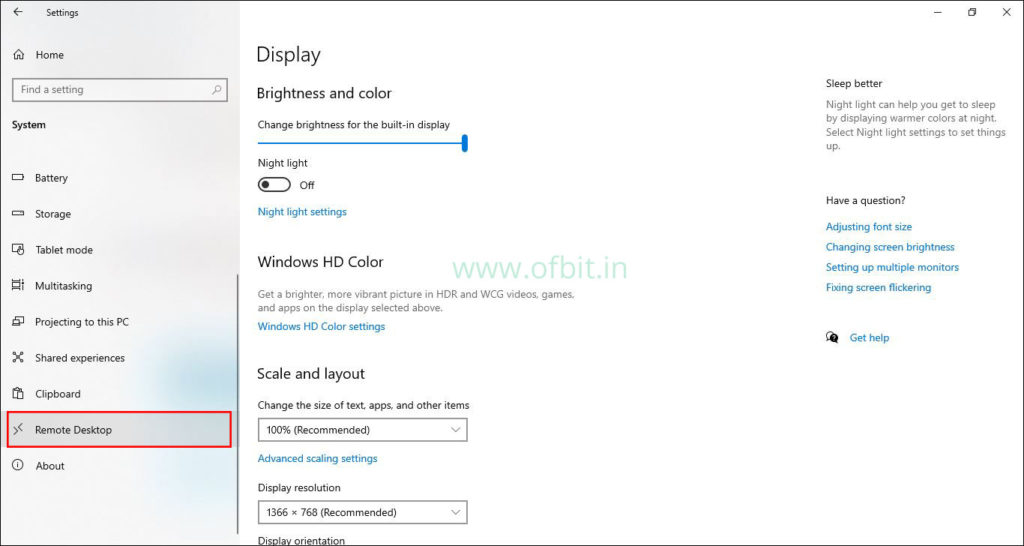
Step 3: Select Remote Desktop
From the Left section, select Remote Desktop Option
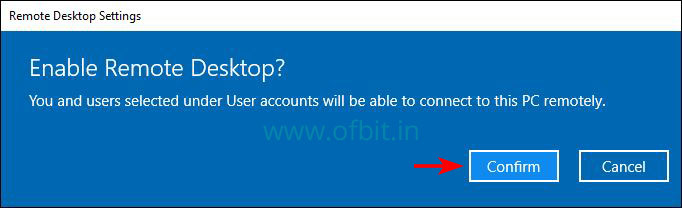
Step 4: Enable Remote Desktop
Turn on the toggle switch under Enable Remote Desktop

Step 5: Click Confirm.
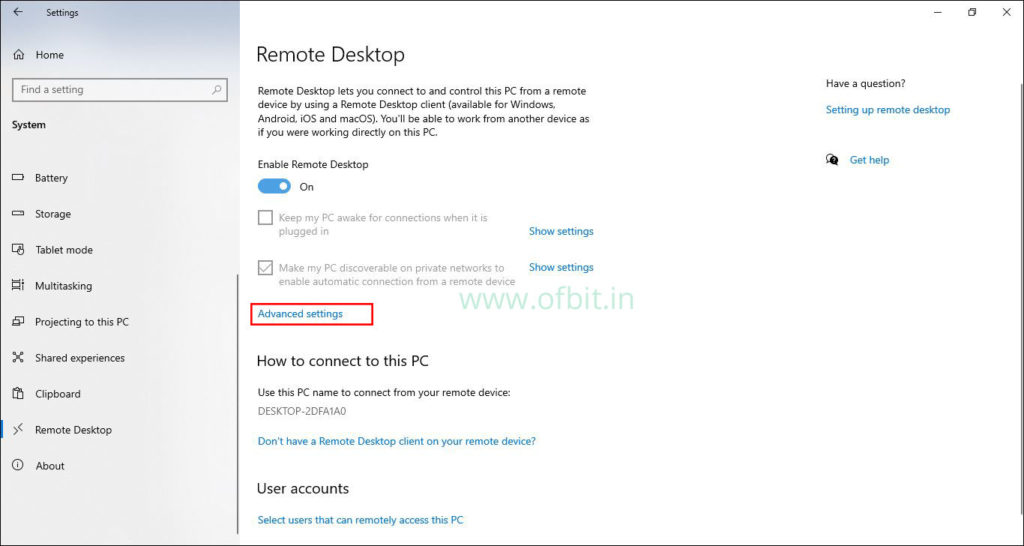
Step 6: Go to Advanced settings
Once Remote Desktop is enabled, click on the Advanced Settings
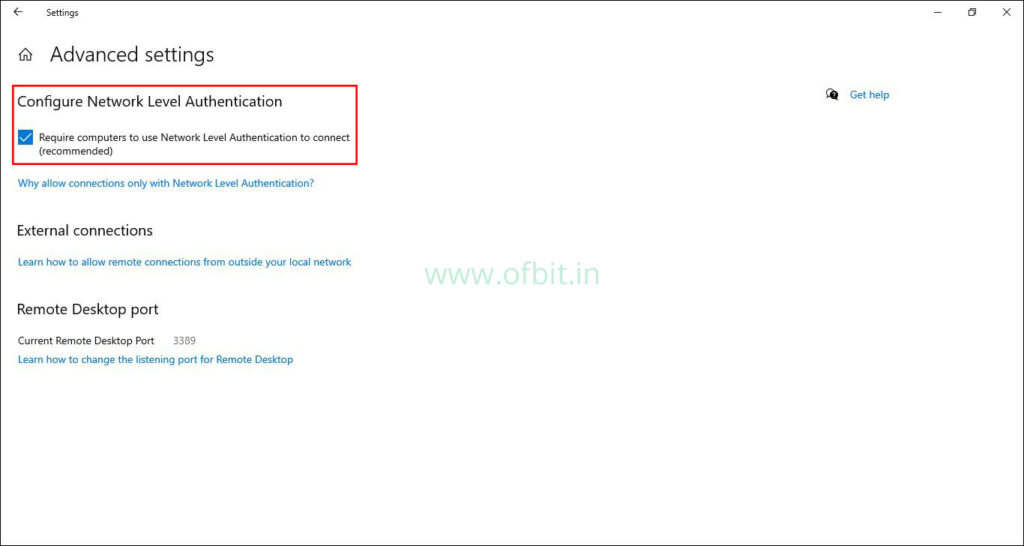
Step 7: Configure Network Level Authentication.
Select the checkbox, Require computers to use network-level authentication to connect (Recommended)
I hope, after performing the steps, you are able to take remote desktop of other PCs in the network.
Related Search:
- Enable remote desktop windows 10 home
- Windows 10 remote desktop app
- How to Enable and Use Remote Desktop for Windows 10
- How do I Enable Remote Access in Windows 10
- Remote Desktop into Windows 10