![RHEL-7-[GUI]-Installation-[Step-by-Step]-Ofbit.in](https://ofbit.in/wp-content/uploads/2019/09/RHEL-7-GUI-Installation-Step-by-Step-Ofbit.in_.jpg)
In this tutorial, we will learn How to perform a clean Graphical Installation of Red Hat Enterprise Linux 7 GUI version. A clean installation refers to installing the operating system on to a computer that does not have an installation present.
Before we start Installation of Red Hat Enterprise Linux 7.x with Screenshots with GUI to get Desktop Experience, we require:
Related Article :
How to Create Bootable USB Drive using Rufus [Step By Step]
How to change Boot Device Priority [Step by Step]
Installation of RHEL 7 – Step By Step
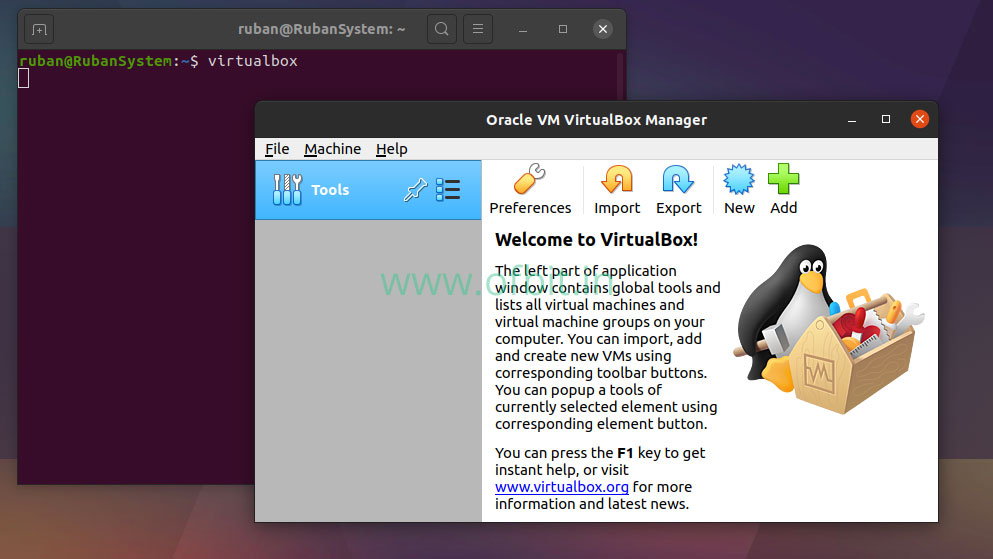
Step 1: Place the Bootable USB or DVD into the appropriate drive and Start/Restart the system.
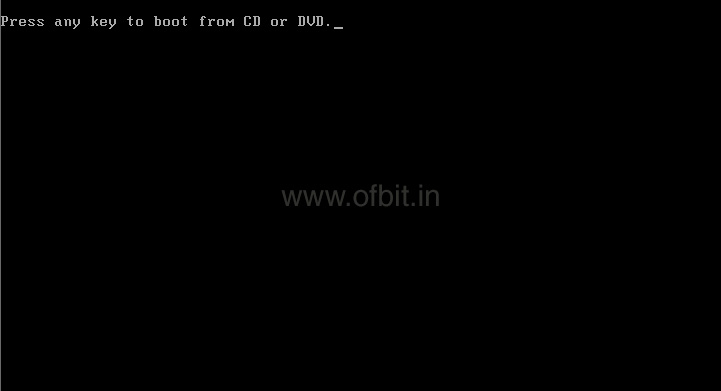
Step 2: Press any key from the keyboard when the below screen appears.
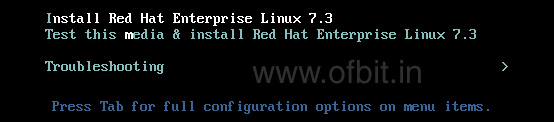
Step 3: Select the first option “Install Red Hat Enterprise Linux 7.x ” in the boot menu and press Enter.
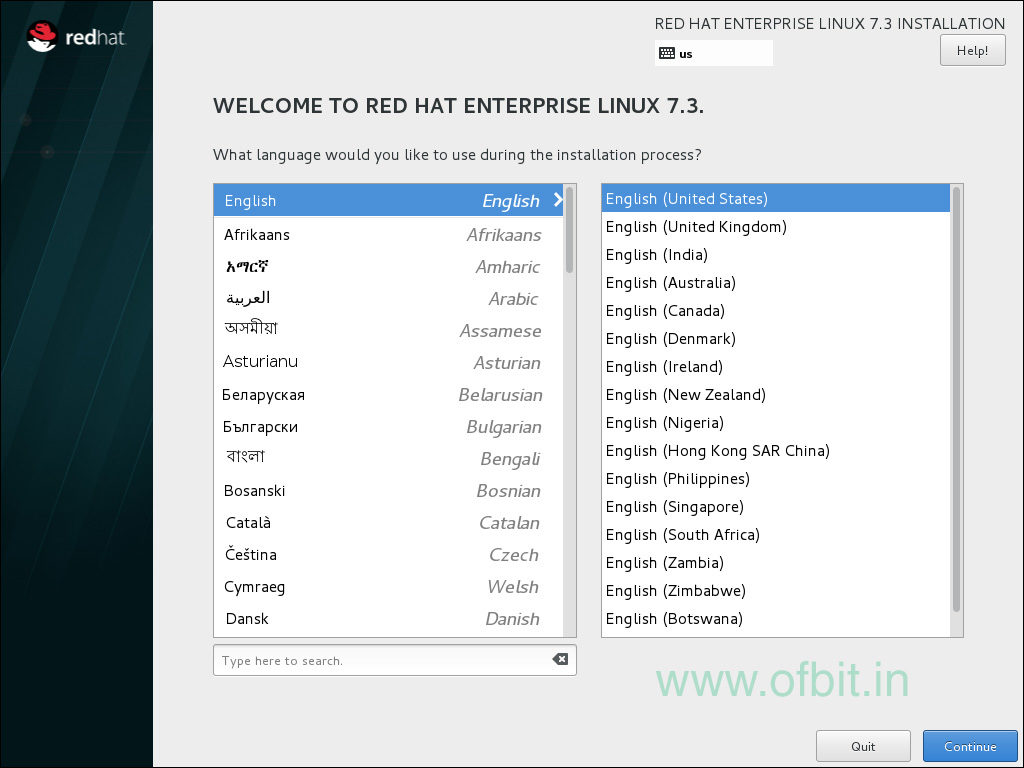
Step 4: After the system loads, the Red Hat Enterprise Linux installer started, select your language and region, and click Continue.
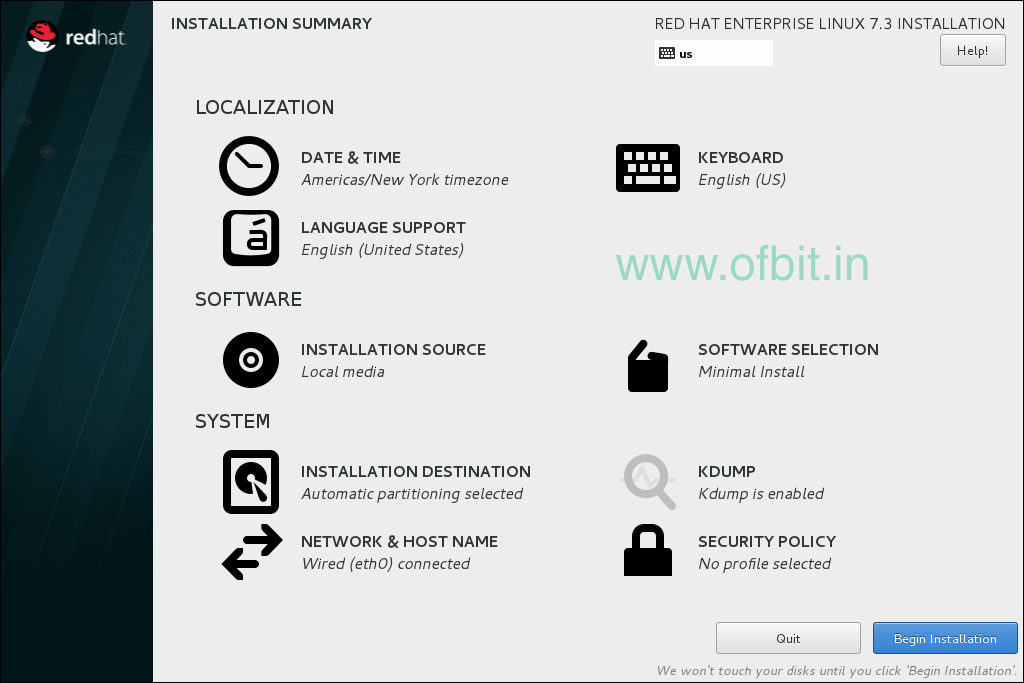
Step 5: In Installation Summary screen you will find configuration options:

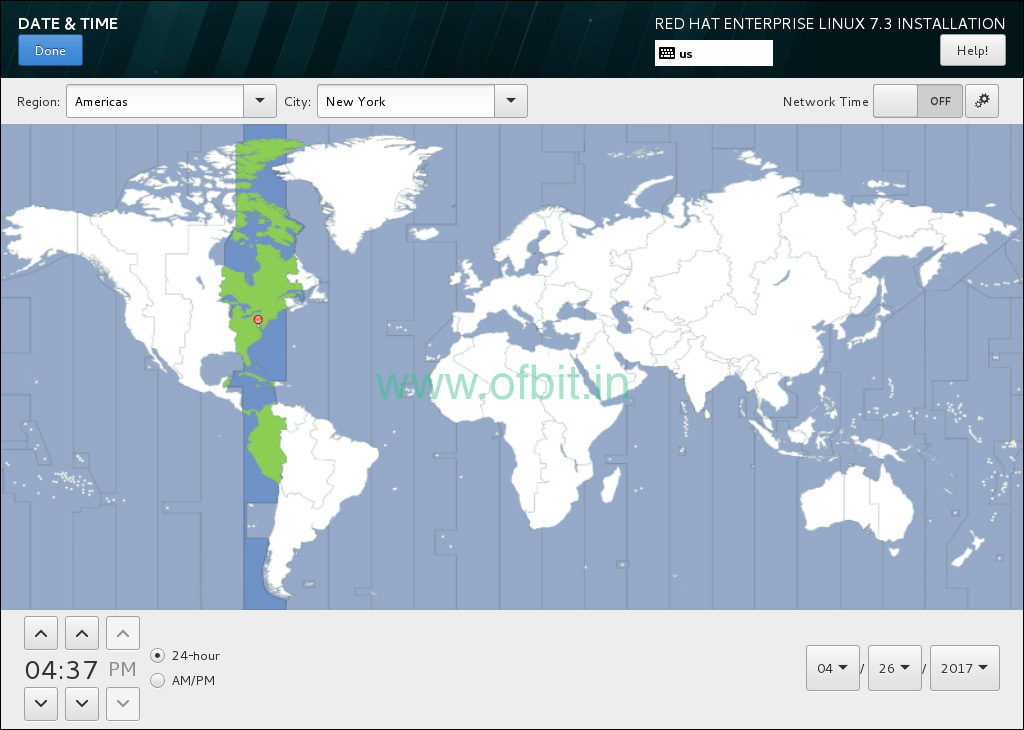
Step 6: First Select DATE& TIME. Then set your Region and the nearest City in your time zone.
Click Done to return to the Installation Summary.
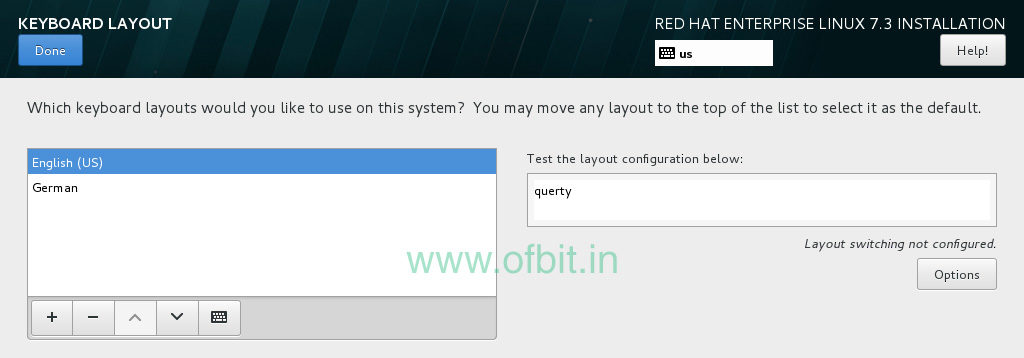
Step 7: Select Keyboard Layout. Use the “+” and “-“ buttons to add and remove keyboard layouts.
I suggest, left it untouched.
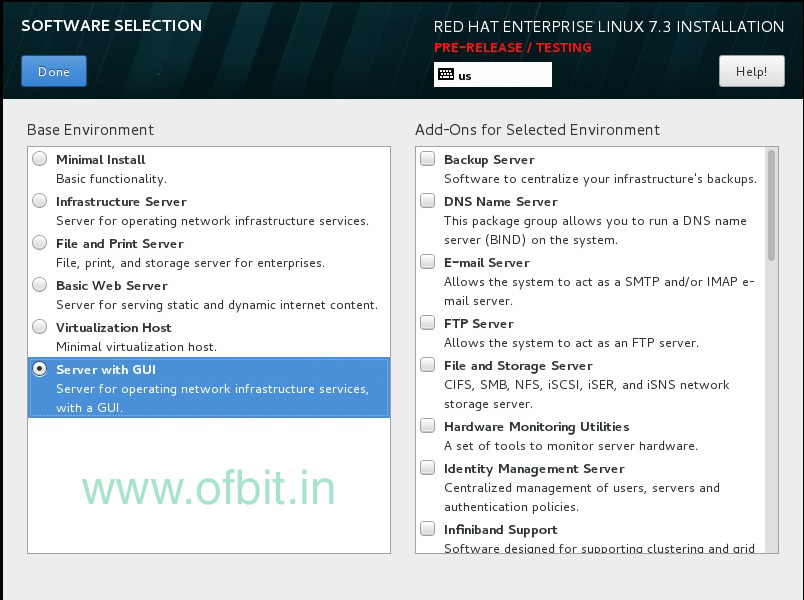
Step 8: Now select SOFTWARE SELECTION. As we perform the Graphical installation, choose the Server with GUI from Base Environment section. from the right side Add-on section, you can choose features according to your requirements and select Done.
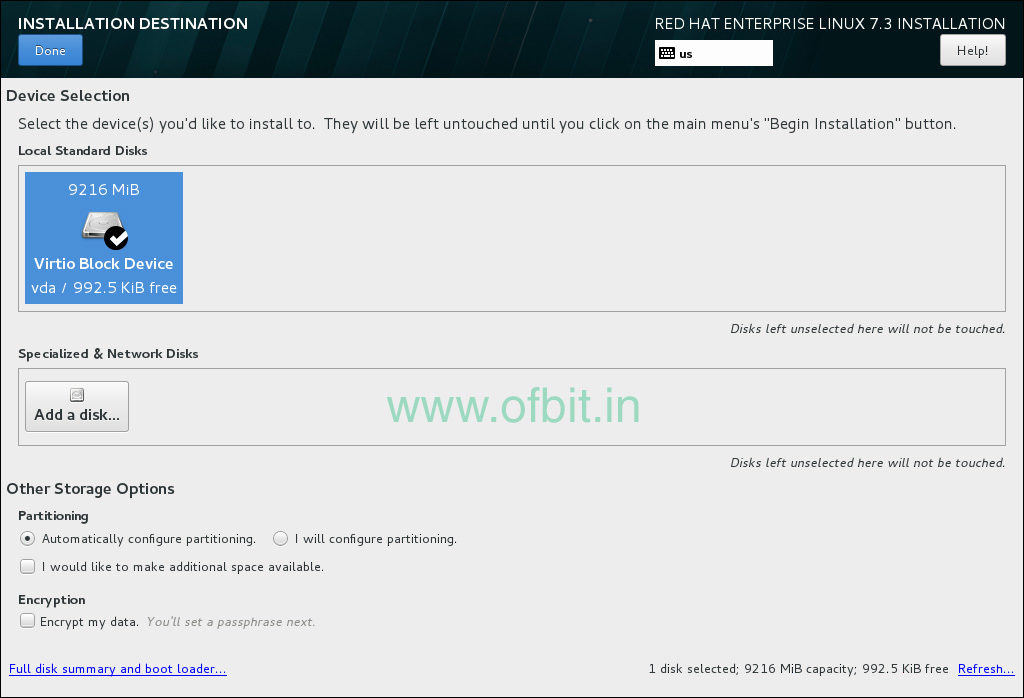
Step 9: The next and most important step is to configure your partition.
Select Installation Destination.
Select the target disk. A checkmark is displayed next to the selected target.
There are two options:
First, ‘Automatically configure partitioning‘ that’s mean the system will itself configure file system. Choose this option if you don’t know much about the Linux file system and new to it. I perform this option in this tutorial.
Second, ‘I will configure partitioning’, that’s you can manually configure the file system.
I preferred the second option with the following partition
- /boot : 250MB
- / : 20GB
- /home: 2GB
- swap: 4GB (note: better to allocate the amount double of your RAM amount.)
But for this tutorial I will choose the First option, Automatically configure partitioning.
Click Done to return to the Installation Summary.
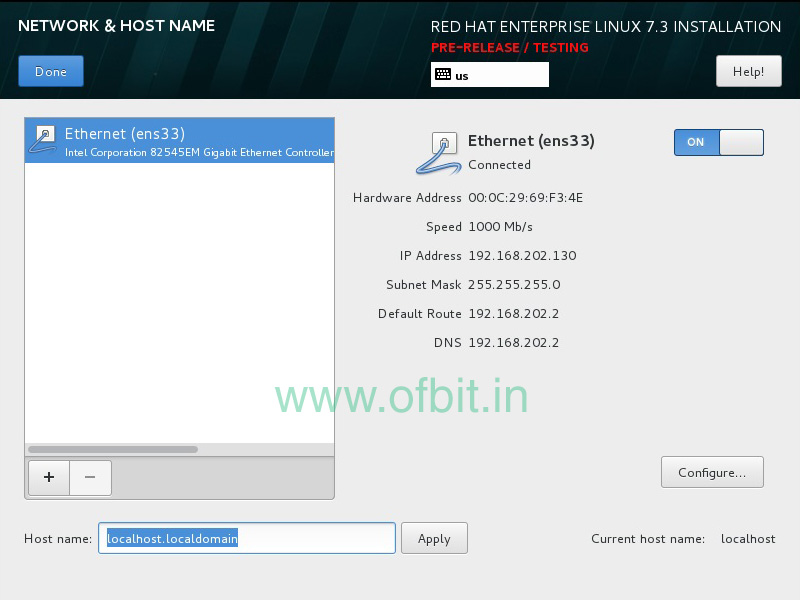
Step 10: In the last step, Select NETWORK & HOSTNAME to configure the Network settings. In this tutorial I suggest to leave this option as it is, we will configure later.
Step 11: Well, now we have done with our configuration on the Installation Summary screen, click Begin Installation.
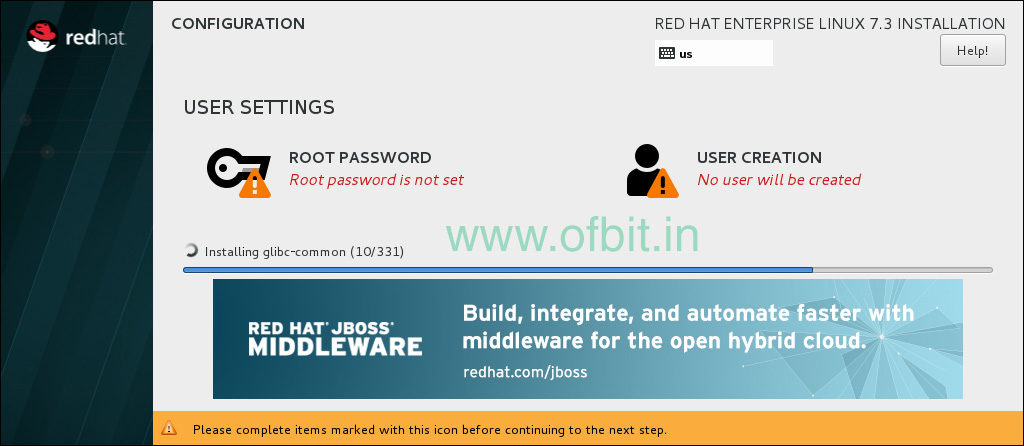
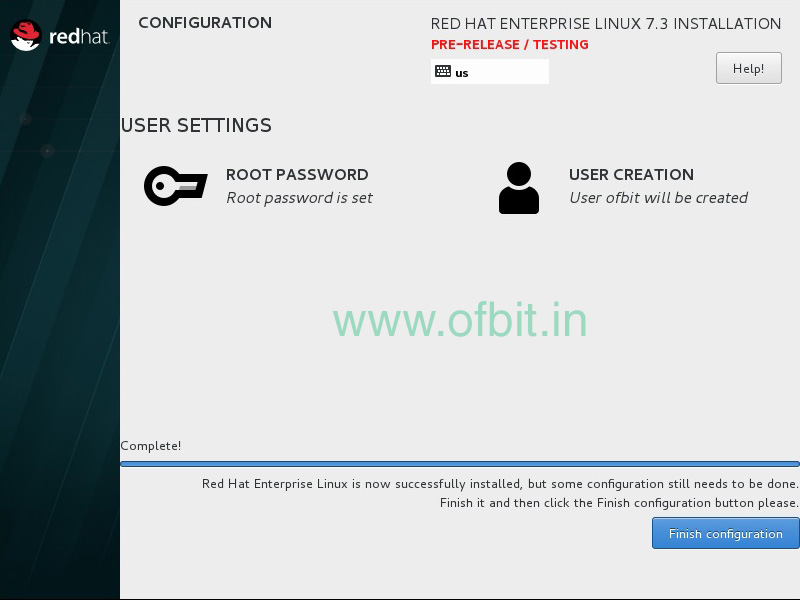
Step 12: Now the installation starts and the Configuration screen is displayed like this, where you ask to set the ROOT PASSWORD and USER CREATION.
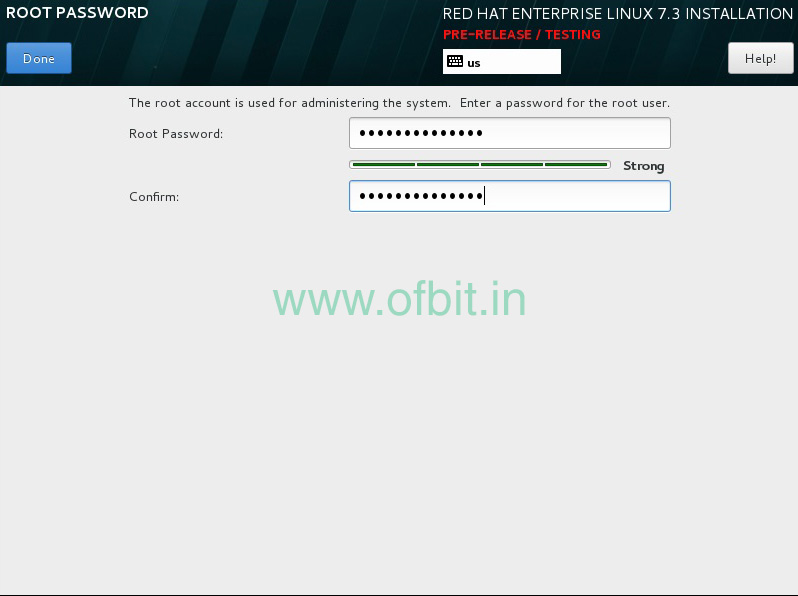
Step 13: Select Root Password, and try to choose a strong and complex password and click Done.
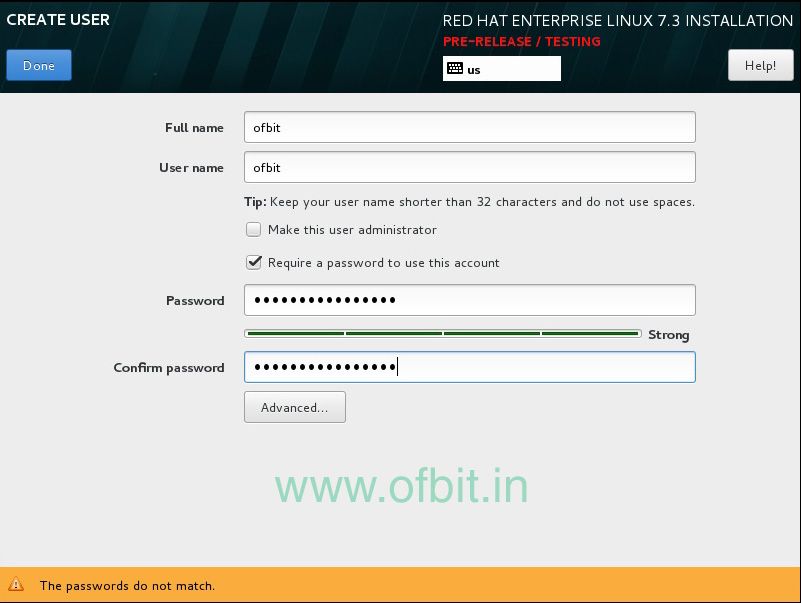
Step 14: Select USER CREATION, and choose a Username and Password and click Done.
Step 15: Wait for a few moments and choose Finish configuration when the installation is successfully done.
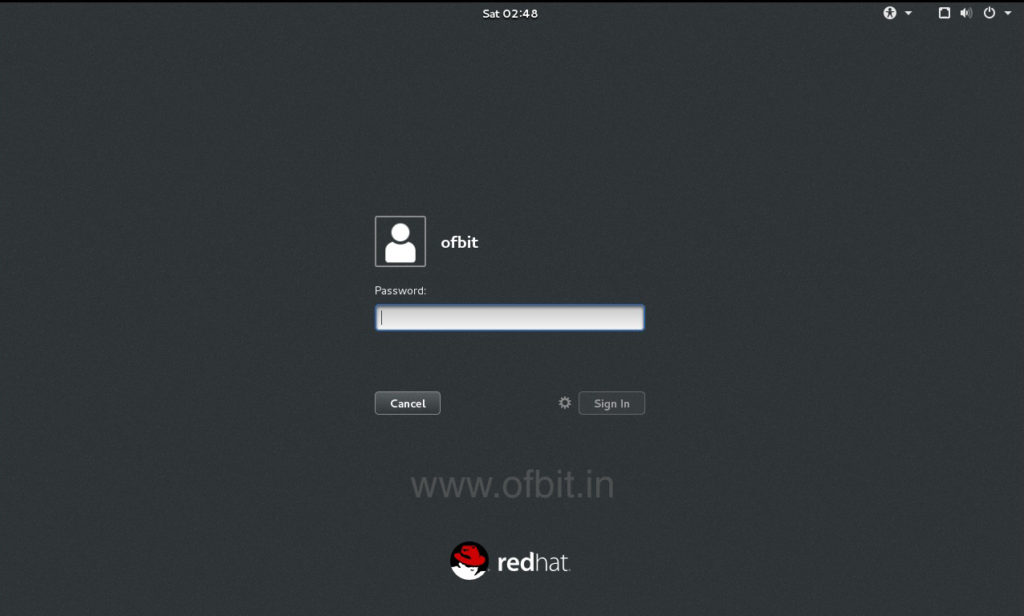
Well congratulations, you have successfully performed a clean installation of RHEL 7. Now remove your installation media and log in with your Username and Password.
In our upcoming tutorials, we will learn about Redhat Linux and its options.
Related questions:
- Installation of Red Hat Enterprise Linux 7.0 with Screenshots.
- Red Hat 7.x Installation: Step by Step Guide.
- Step by Step Red Hat Linux 7.0 installation with screenshots.
- How to install Red Hat Enterprise Linux (RHEL) 7.
- Red Hat Enterprise Linux.
- Red Hat Enterprise Linux 7.
- Red Hat Enterprise Linux Server.
- Red Hat Linux latest version.