In this tutorial, we will learn how to perform a clean installation of Windows Server 2016. A clean installation refers to installing the operating system on to a computer that does not have an installation present.
Before we start Windows Server 2016 installation GUI mode to get the Windows Server 2016 Desktop Experience, let’s know about some basic things.
System Requirements
The following are estimated minimum system requirements to install Windows Server 2016.
- Processor: 1.4 GHz 64-bit processor.
- RAM: 2 GB (for Server with Desktop Experience installation option).
- HDD: 80 GB
- Installation Media: Bootable DVD or Bootable USB Drive
Performing Clean Installation
A clean installation refers to installing the operating system on to a computer that does not have an installation present.
This process is very simple, you are just only asked to do the following:
- Select Language, Time and currency format and keyboard method.
- Choose an Edition and build of Windows Server.
- Agree to the License Agreement.
- Choose between manual and upgrade installation.
- Configure the disk.
- Set the Administrator password.
- Log in.
Before start installation, we require
- Windows Server 2016 ISO file. [You can download the Windows Server 2016 ISO from here ]
- Create the Bootable USB or CD/DVD. [Click here to learn How to Create a Bootable USB drive.]
- Set up your Boot device priority in BIOS. [Click here to learn How to change Boot Device Priority.]
Server 2016 GUI Installation Step by Step
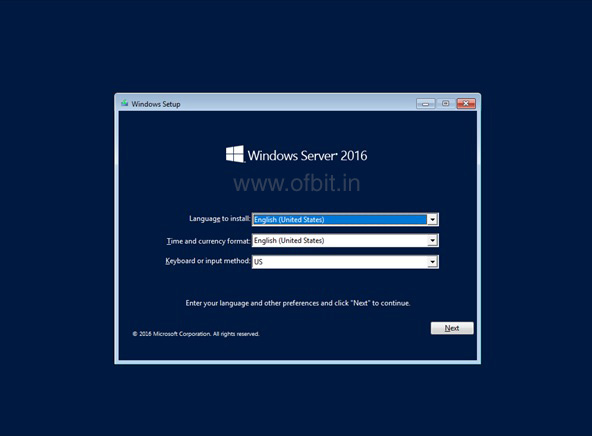
Step 1: In the first screen, you can able to configure language, region and time, keyboard settings. We should configure correct settings here and then select “Next” to continue.
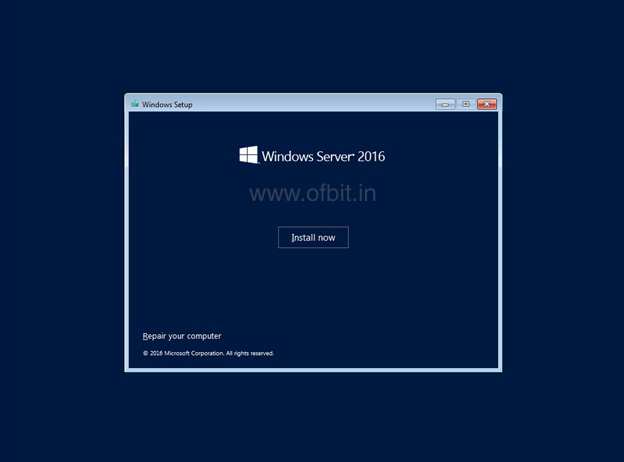
Step 2: On this screen, I select “Install Now”. Here is another option available “Repair your computer” to choose if existing OS is missing some system files to repair.
Step 3: Wait for a while…… Setup is Starting….

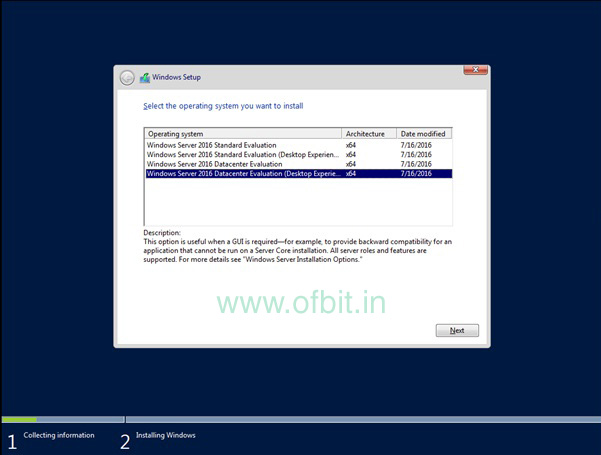
Step 4: On this screen, I ask to choose the edition of the server. Here are two types of edition available one is Standard Evaluation and another is Datacenter Evaluation with Core or with GUI option. In this tutorial, I am going to choose Datacenter with GUI Option.
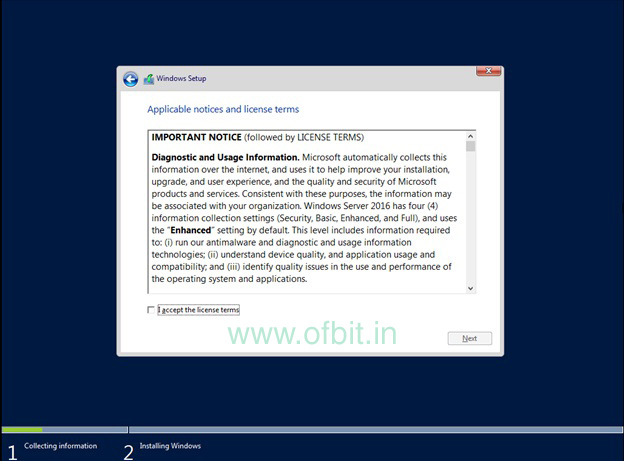
Step 5: We can see the license terms on this screen, select “I accept license terms” then click “Next” to continue.
This is the License agreement which has to read and accept to further process. I know you people might think is it really require to read the full agreement as it is sooo boring, Well, a maximum of geeks moved to the next screen without reading a single sentence.
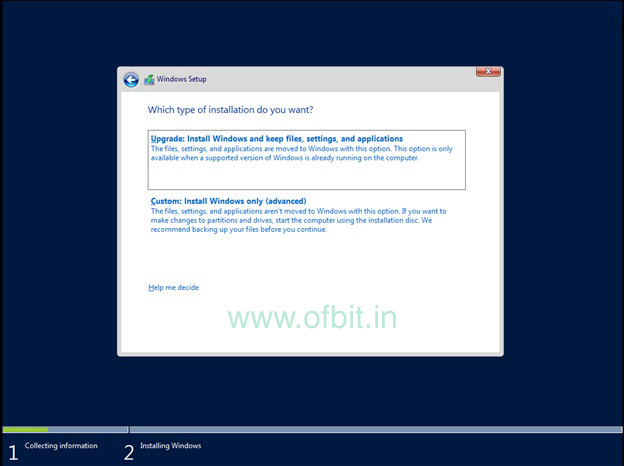
Step 6: In this screen Select “Custom: Install Windows only (advanced)” here because I do a clean installation. But if you need an in-place upgrade you should select “Upgrade: Install and keep files, settings, and applications” here. This option suitable for supported OS, features, services, and roles. But keep in mind you should not prefer in-place upgrade for critical roles like Active Directory Services, etc.
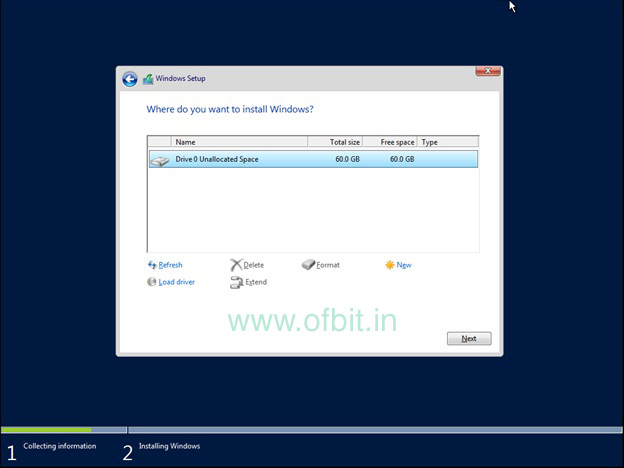
Step 7: In this screen, we can select and configure disc information (You can set the installation disc, size, etc.). I used default settings here.
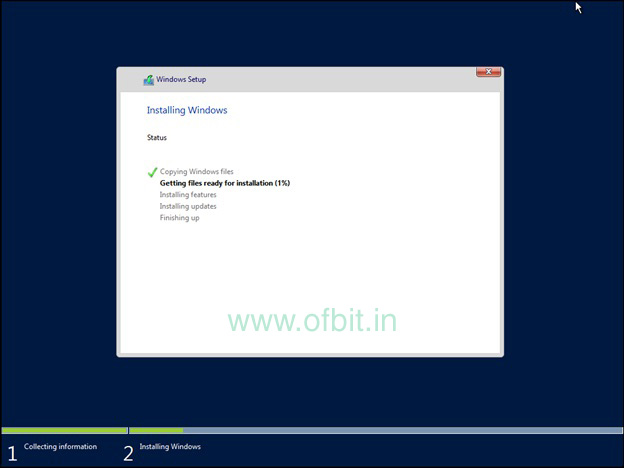
Step 8: Now sit back and wait for the next screen as you can see that the necessary files are copied and the installation process is running on this screen.
Step 9: After the installation process is completed it will automatically reboot.

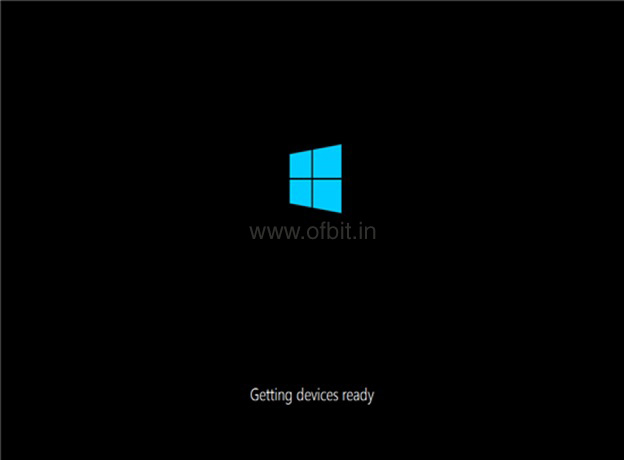
Step 10: This screen shows that the necessary settings were made before the server was started.
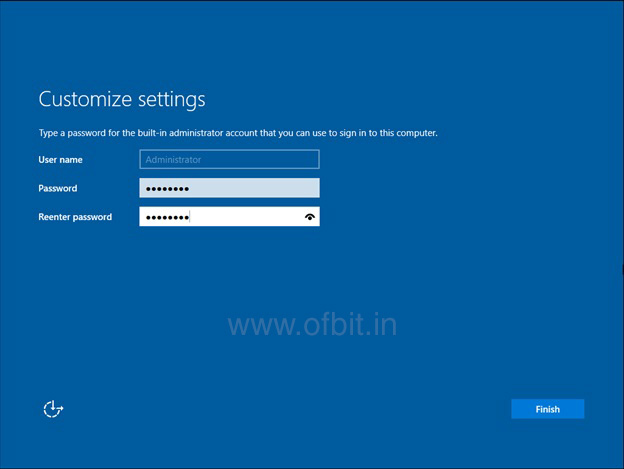
Step 11: Here we can set a password for the local administrator account. You should configure a secure password for the local administrator. Set your password to something very strong, in fact, you can use a passphrase.
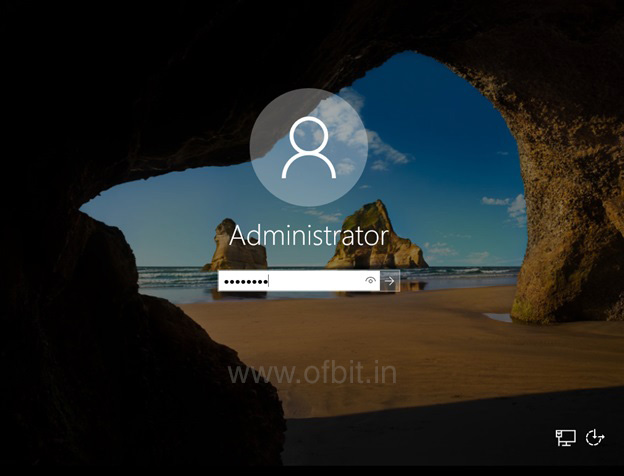
Step 12: As we have completed our installation process now on the login screen, I can log in with the “Administrator” account and related Password which I set in the last step and press “Enter“.
Well, we have successfully installed Windows server 2016 with Desktop experience and ready for further configuration.
In our upcoming tutorial/article we will learn more about the Windows server tool, features, options, services etc and there use.
Related Questions and Tags:
- Windows Server 2016 Installation,
- Installing Windows Server 2016,
- Windows Server 2016 Installation step by step,
- Install Windows Server 2016 Step by Step,
- How to Install Windows Server 2016,
- How to install windows server 2016 from USB,
- Windows Server 2016 install GUI.


Hi, You’ve done a great job. I’ll certainly digg it
and personally recommend to my twitter followers. I’m confident they will be benefited
out of this website.